Showing posts with label Holidays. Show all posts

Thursday, December 8, 2011

The Last Half - Advent Calendar

Well I certainly got off track with my posting when I left town for Thanksgiving. I thought I would have all the time in the world to post while I was on vacation, but of course spending time with family always soaks up every minute and ounce of energy I have. So I will post the rest of the advent squares all together.

I have to admit that my advent calendar is still not finished. Yes I know that it is the 8th of December, but in my defense I have had many other things to take care of that are higher on my priority list than crafting - such as being a wife, mother, and homemaker. Normal everyday responsibilities sometimes add up for me, probably because I am not always good at using my time efficiently.

For a while I felt pretty bad about my failure to produce this beautiful advent calendar on December 1st, especially since everywhere you look on the internet people are accomplishing their crafting goals. In an effort to make this blog realistic I would like to say I am not always one of those people. I love to craft and most of the time I get things done by my "deadline," but sometimes it is okay to be a bit behind. After all this is definitely not life or death. And you know what, my son isn't even old enough to understand Christmas, let alone presents and advent calendars. Next year will really be the year that counts. So if I'm a bit behind schedule this year then I say it's okay!

Enough with the confessions. Here are the last 13 squares. I love how they all turned out.


All 25 pockets are now sewn to my tree backing. I just have to finish stitching the numbers - which is very fast to do so far - and then sew the layers together. I hope to have it all complete and hanging on the wall this weekend. I am pretty confident it will happen too, because I'm finally sick of seeing it sitting on my craft table.

Friday, November 18, 2011

Group #3 - Advent Calendar

Four more pockets stitched! These four sure turned out fun. My favorite of the bunch is definitely the Christmas lights. They are so cute!


Can you tell that the last one is a wise man? I think he needs a beard? Or something...he just feels like he is missing something. I can't really figure it out though so it may just stay the way it is. If you have any ideas on how to make him appear more "wise" then please let me know!

Now I have 12 down and 13 more to go! Almost halfway!

Wednesday, November 16, 2011

Group #2 - Advent Calendar

Here's the second batch of advent calendar pockets...


I have to admit that the milk and cookies is so far my least favorite one. The idea is so fun, but I think I just didn't quite execute it correctly. I think it would have turned out better if I had made the window cover the entire top portion of the square (maybe with 2 windows & 1 set of curtains?). I don't know. It might bug me enough to add some "wall paper" to the background. We'll see.

All of the other ones turned out great! I think the reindeer is adorable and I love the bell with music notes and the presents.

So far I am still going strong. I have been working constantly on this project, but I think that it will be slowing down soon for the Holiday travels. Hopefully I can still get it all done before December 1st!

Monday, November 14, 2011

Group #1 - Advent Calendar

My first 4 squares are ALL done! I am so, so, so excited about how they turned out. And seeing them done is getting me more and more excited to continue stitching my heart out.


I absolutely LOVE my little snowman! And the gingerbread house turned out so cute as well. The stocking is fun too! And you just can't go wrong with a beautiful snowflake right? It is so nice to begin seeing a finished product!

I have more pockets in the works and will be sharing more batches over the next week and a half or so. I must admit that each pocket takes a good 2-3 hours. Except for ones like the snowflake. That one only took about 45 minutes at most. The gingerbread house definitely took a good 3 hours. All of the little french knots just take time because you have to cut and re-knot and cut and re-knot quite a few times. It was all worth the time though.

And I must confess that I have been listening to Christmas music while working on this advent calendar. I am ashamed to admit it, but how can you work on something so festive and not enjoy some good tunes? Hopefully next year I will come to my senses and enjoy Thanksgiving fully before moving on to Christmas.

PS: If I find the time then I might come up with some Thanksgiving decorations for our home. However, I am guessing that next year will be the year for Thanksgiving decorations since we are headed out of town this weekend and won't really be able to enjoy any decorations that I make. We will see though. Happy Monday to you all!

Friday, November 11, 2011

Christmas Advent Calendar {My Life During November}

In honor of this fun date - 11/11/11 - I thought I would share my November project. It has pretty much taken over my entire life this month. I have been working on it every spare moment I can find. The initial idea for this project came from A Feathered Nest. She created a Christmas advent calendar two years ago that I LOVED. I didn't find it until last year at the end of November so I did not have the time to create my own version for Christmas. This year will be our first Christmas not visiting family so I thought it would be the perfect year to start a tradition of an advent calendar.


If you can believe it, I started this project way back in March. I gathered supplies and began cutting out the felt squares for the pockets (just the bases). Then a few months went by and I didn't do any work on it. In August I started cutting out some of the shapes for the images on each pocket. When I planned out my pockets I wanted to have a Christmas themed image on each one. Abby's version HERE had quite a few pockets that were darling, but they were just simple patterns/designs and I just didn't want to go that route. I wanted each square to be unique and I also wanted to bring in the religious aspect of Christmas more - since Christ is was Christmas is all about. I have been working just a little here and there ever since August on the cutting phase.


At the end of October I decided that I really wanted to finish it in time for Christmas this year. So I set out a schedule to finish it in one month. So far I am still on schedule to finish by November 30th. I hope I can make it!


Here are my squares at the first stage - just cut outs! This project will be entirely hand sewn. That is why it will be my life this month. I have been stitching, stiching, and stiching everyday for the past week and a half. I am so excited to see the finished project at the end of the month.


All 25 advent pockets. Remember, these are just the cutouts so they really don't look that great yet. The stitching is where the magic happens. Which is funny because I have NO experience with embroidery or hand stitching. Hopefully it all turns out good!


Snowman, Gingerbread House (I added this one), Bell (to symbolize music), Presents!


Stocking, Snowflake (my addition), Christmas Lights (inspired by the pictures of Abby's friend), and Mittens.


Milk and Cookies, Rudolph, Holly Leaves & Berries, Wiseman (all of these are Meagan originals except for the Holly Leaves).


Santa's Sleigh, Mary, and Christmas Tree (the sleigh and Mary are my additions).


Sheep, Gingerbread Man, and Angel.


Ornament, Birthday Cake (to celebrate Jesus' birth - I think this will help my son get more excited about celebrating Jesus' birthday), and Candy Canes.


Wreath, Cup of Hot Cocoa (another addition of mine), and Santa Clause.


And last, but not least, Baby Jesus in a Manger.


I am so excited to see these done with the stiching. Some of them are close so I will start sharing them next week. There's still time for you to make your own as well. So go gather your supplies and start sewing with me!

Monday, October 31, 2011

Happy Halloween

Happy Halloween!

We had a fun weekend leading up to Halloween, and a fun Halloween today! We did the traditional carving of pumpkins over the weekend...


Then this morning I thought it would be fun to make a nice breakfast and try my hand at pumpkin and ghost pancakes! I think the pumpkins turned out better than the ghosts. I just free handed these. They of course would be a lot better if I had had a pancake mold. Maybe I'll get one for next year.

I also made bacon this morning (which I absolutely hate doing). I have a hard time with cooking bacon because the grease is always spitting at me and I can never get it just right. Today I decided to try a new method - in the oven. Let me just tell you that I will never cook bacon another way. Now I won't skip over recipes with bacon in them just because I'm scared to cook it.

So here's how you cook bacon in the oven. Line a baking sheet with tin foil. Place bacon on the tin foil in a single layer. Place in the oven (without the oven on) and turn the oven on to 400 degrees. Cook for 17-20 minutes or until brown and crisp. Remove from oven and transfer bacon to a paper towel lined plate. Let cool and eat! So simple and I promise this works great.

Anyway, moving on. I then spent the rest of my Halloween day making our costumes for our parties... I decided to wait until today to make them because of the balloons. I wanted the helium to be fresh and to last so I picked them up this morning and put everything together while my son took a nap. I finished 3 hot air balloons in 2 hours. They are that simple. And I LOVED how them turned out.


We enjoyed a nice trunk-or-treat at our church and then joined some friends for a party afterwards. Our hot air balloons were a big hit and everyone thought they were very fun. All of the little kids loved them too, and they kept wanting to play with the balloons. I'll post instructions another day so stay tuned.

Wednesday, October 26, 2011

Monster Bag

I saw these darling felt Trick-or-Treat bags over at homemade by jill. I had some felt squares on hand and thought it would be fun to whip one up for my little guy. My version is quite a bit smaller than Jill's but my little one is only 17 months old so it will hold more than enough candy for him to enjoy.


I didn't have ric rac on hand so I just cut a strip of felt with pinking shears. I made it a bit too long so Frankenstein's eyebrow is huge, but it's Frankenstein right?


This project was super fast. It took me a total of 1 1/2 hours from start to finish (and I am a really slow cutter, sewer, crafter so it can totally be done in a 1/2 hour if you are awesome)!

I am so excited for my son to use it next Monday for the trunk-or-treat at our church.

Friday, October 21, 2011

Bats!

After hanging my trick-or-treat banner I wanted to get more decorations up for Halloween. I just got so excited about decorating. I saw these bats over at MADE a while back and I thought they would be kind of fun and simple. I think that Dana's look a lot more realistic and exciting, but it has been fun to have these bat friends hanging out in our home.


The more decorations I get up the more I want to do. It is really exciting to see something different going on in our little eat-in kitchen (or dining room as we call it). I have a few more ideas rolling in my head, but I am not sure if I will use them this year or wait until next year to do them. It is after all only 11 days until Halloween.

Wednesday, October 19, 2011

Trick-or-Treat

I have been trying to find new and exciting ways to decorate my apartment for the Holidays. I have neglected decorating for most of the Holidays because we simply have no room to store any decorations from year to year. However, I am officially sick of the same old apartment so I have decided to come up with inexpensive, easy crafts that I can either fold up flat and store easily in a small space or possibly even throw out and re-do the next year.

My first project along these lines was this Trick-or-Treat paper banner...


I absolutely LOVE how it turned out! It is the only Halloween decoration that we have in our house, but it at least makes me feel a little bit better as a homemaker/house decorator. Plus it is making me really excited for Halloween! I am hoping that I can make some other little decorations over the next week so that I can add a bit more. Then hopefully next year I can add even more. I only have a couple of ideas right now of more things to do, so if you know of any easy, inexpensive decorations that I can add to my home then please let me know!

To make the trick-or-treat banner I simply cut out triangles from THIS template for the words, as well as a few colorful ones to border the words. Then I used a scalloped circle punch to punch circles out of coordinating paper. Then I used a hole punch to punch 2 holes on the top of each circle/triangle and fed thin, white ribbon through. For the letters I created them in Word and printed them on white cardstock. Then I cut them out the old school way with scissors because I don't have a silhouette machine and my cricut blade is broken.

Want to make your own Trick-or-Treat banner? Save the images below to your computer and simply print on white cardstock. Then cut and glue (I simply used a glue stick) them onto the paper of your choice.


Happy banner making to you all!

Monday, April 25, 2011

Easter 2011

This year Easter was kind of a pathetic attempt at a celebration for me.


These three jars were all the Easter decorating I had time for. And I didn't even get a wreath on my door - totally lame.

But I was pleased that the Easter bunny still managed to find our poorly decorated apartment. And he still left treats and gifts for us all.


Bennett had a fun first Easter playing with the eggs!


And he looked so handsome in his new Easter outfit!

We did enjoy a magnificent Easter feast (just for the 3 of us) with THESE most amazing au gratin potatoes. They were the most delicious potatoes I have ever eaten. I didn't get pictures though so check out Mel's Kitchen Cafe for pictures good enough to eat.

We also enjoyed a slower than usual Sunday morning with dad home to eat breakfast with us. We had IHOP pancakes (recipe to come soon), scrambled eggs, and fresh strawberries. That is the biggest breakfast I have made on a Sunday in probably over a year now. It was fun to eat all together.

I also whipped up some special Easter cupcakes for dessert, although by the time we ate dinner and candy from the Easter Bunny we had no room for our cupcakes. They were fun nonetheless.


Eggs in the Grass Easter Cupcakes

Cupcakes
Frosting
Shredded, Sweetened Coconut
Green Food Coloring
Jelly Beans

Put coconut in a bowl and put 4 drops of green food coloring in. Mix with a fork until coconut is a nice, grassy green. Frost cupcakes, dip in green coconut, and put jelly beans on top so they look as though they are Easter eggs hiding in the grass.

I had this idea from Our Best Bites' chick cupcakes. Then I saw Dana's Easter eggs in the grass cookies at MADE and I sort of just combined the ideas to create my own version.

Hope you all had a wonderful Easter!

Monday, February 14, 2011

Happy V-Day!

Happy Valentine's Day blog world. It has been busy around here since the start of the year but I have a few yummy recipes to post about soon. And I have a million friends having babies in the months to come so I am cooking up all sorts of crafty ideas for baby showers and gifts. Plus at some point I will actually get some of my sewing projects on my to do list done and posted. Here's what we enjoyed doing for Valentine's Day.


I made heart shaped pancakes from scratch. The recipe was quick, easy, and delicious. Then I warmed up some frozen strawberries over the stove and blended them up to make a yummy, quick strawberry sauce (it's just not Valentine's Day without something strawberry).


Then I also used my heart shape pancake molds to make heart shaped scrambled eggs. Cheesy, I know. But fun and yummy. I figured this was my year to play around because my son is not old enough yet to eat these things, let alone care about them. Next year I want to do THIS surprise breakfast, from Our Best Bites (I hope my husband doesn't read this), if I can manage to ever wake up before my husband. It looks so fun!

The rest of our day was pretty normal, except dinner went in the oven around 6:00 PM (talk about LATE), then just before it was coming out my husband was called to help give a blessing to a boy who is sick (learn about blessings HERE if you don't know what I am talking about). Thus it is almost 8:00 PM and we are just about to sit down to a fantastic dinner. Pictures and recipe to come tomorrow! Happy Valentine's Day everyone.

Saturday, December 25, 2010

Merry Christmas

For 2010 I made a goal for myself to design our own Christmas Cards. I did this for a couple of different reasons. I first thought it would be fun, then I realized it would be cheaper and therefore a bonus, and lastly I wanted to learn how to manipulate pictures/text in GIMP (a free online program comparable to Photoshop). I absolutely LOVE how they turned out! Here is the final product:

The names are a bit off centered due to the printing at Costco. I off centered them so that once they were cut they would be centered (that was a tricky business). Anyway, Merry Christmas to you all! I have posts about all of the crafty Christmas presents I did this year ready and coming your way this week! Hope you enjoy and are inspired to create something.

Monday, November 1, 2010

November Already?

Is it seriously November already? Where did the year go? We had a fun Halloween with our cute little Tiger. Our family dressed up as Calvin, Hobbes, & Susie from the comic "Calvin & Hobbes." So little Bennett was Hobbes.


I am trying to get all geared up for Holiday presents and crafts. I am starting early because I want to mostly give homemade gifts and I am really hoping to finally finish my Christmas quilt and our Christmas tree skirt. I made a top last year, and I think I now have an idea for how to add a bottom. Plus, I am finally in the process of making pillow shams for my big euro pillows. Hopefully I will have tons to post in the upcoming months before Christmas.

Sunday, April 4, 2010

Happy Easter!!!

This year we hosted an Easter dinner at our little apartment. It was a lot of fun to gather with friends (since family is too far away) and celebrate Easter with what our friends like to call "Feaster." Everybody brought food to share and it turned out wonderfully!


Our "dining room" is pretty small but our table can expand to seat 10 (possibly even 12 but we've never tried it). So we had this huge table crammed into a tiny little space! Fortunately it all just barely fit long enough for us to enjoy our meal.


To minimize dishes and add color to the table I bought paper plates to put on top of the dinner plates. We used the paper plates for the fruit salad and the veggies with dip. Then we tossed them out and moved on to the main course. We had Boneless BBQ Ribs. I love making them but only do it about once a year. It is the easiest recipe ever! Next time I make it I will remember to take pictures.


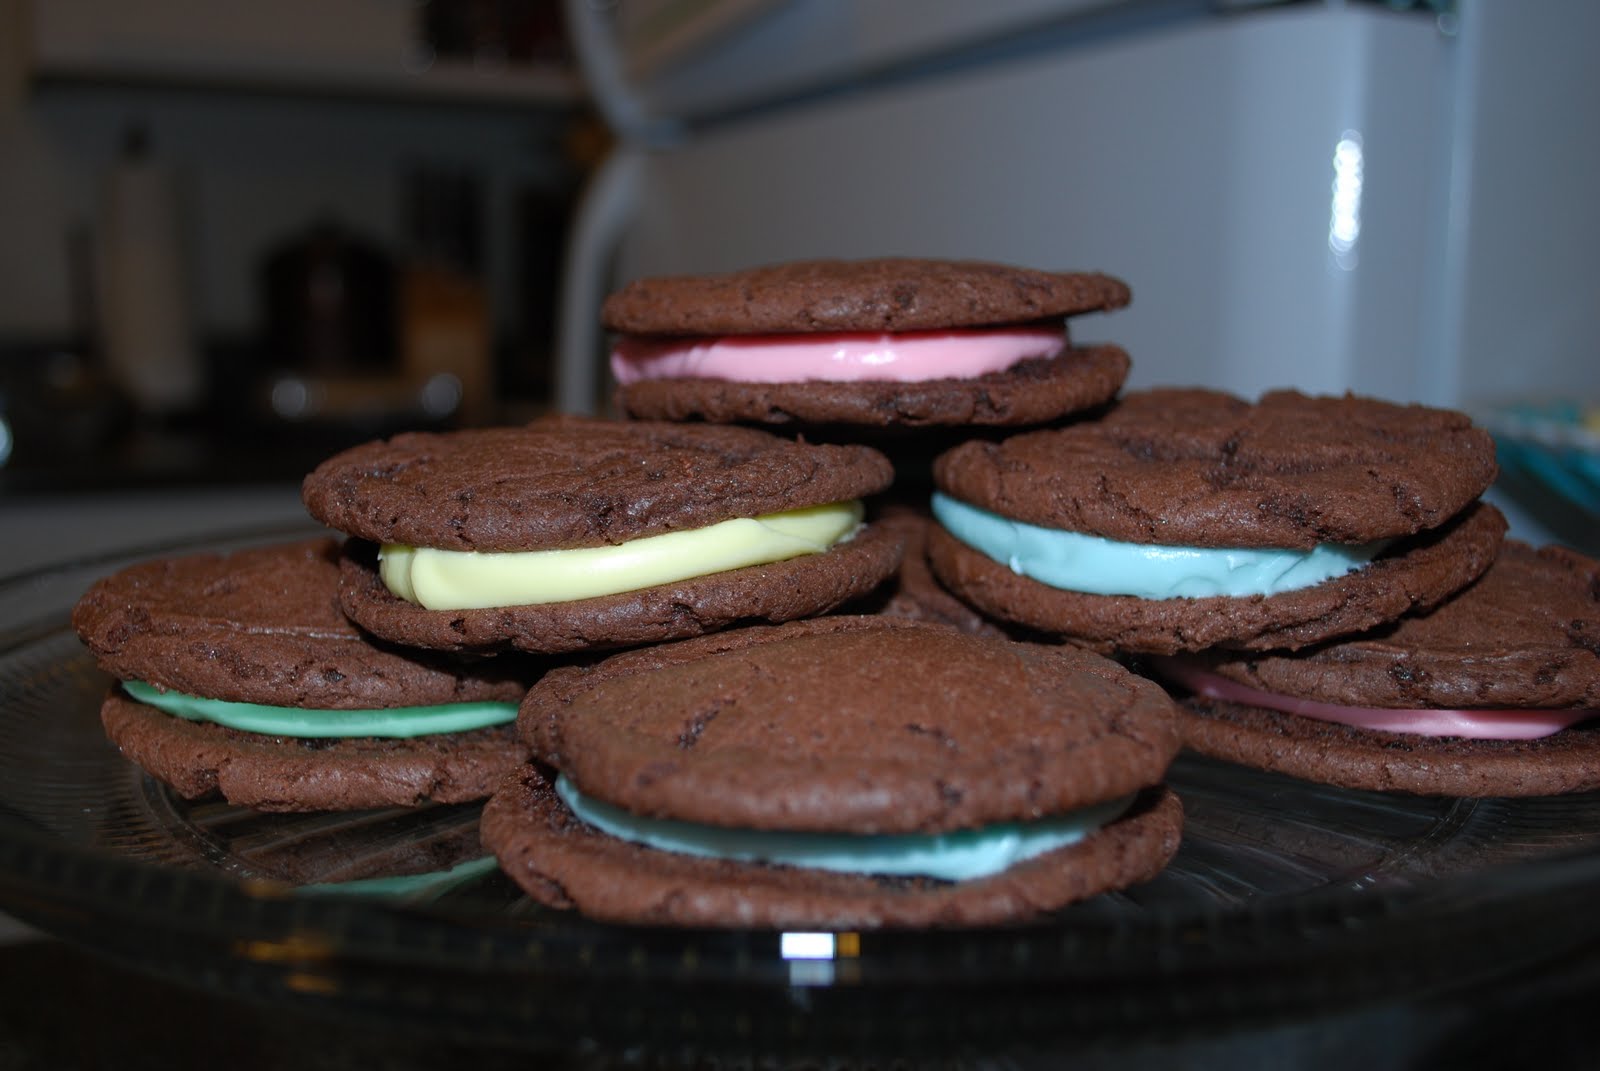
And of course we had to have a variety of desserts. I made Homemade Oreos and added some food coloring to the frosting to make them more Eastery. As always they were a huge hit. Some of our friends brought sugar cookie sandwiches with frosting in the middle and a delicious key lime pie. Thanks to everyone who participated and came to celebrate "Feaster" with us! It was a blast!

Hope you all had a wonderful Easter!

Saturday, April 3, 2010

Fabric Easter Baskets

I saw THESE beautiful Easter Baskets on the Moda Bake Shop website. I completely fell in love with them and knew that they were the project I was waiting for! Vanessa from V and Co. was the genius behind the design.


I made some minor adjustments to the tutorial. Instead of hand sewing the entire basket I began to get impatient and decided I would try using a glue gun! It was so much quicker and I think they will hold up longer because I used the glue gun. I also didn't want to purchase a honey bun (because I think they are too expensive) so I went to the fabric store and purchased my own fabrics and cut them out myself. I bought 5 different fabrics for each basket and cut out 8 strips, measuring 44" x 1 1/2", from each fabric. I actually bought 1 yard of each type of fabric, but I only used 1/3 yard for each basket. Then I had 3 left over strips from each fabric so I will definitely be making more baskets once we have our little guy and hopefully other children as well.


Anyway, here's the "blue" basket for my husband! Our baby boy's will be the same blue and green color scheme.


And here's my girly version! I used the same green polka dot fabric in both baskets to help tie them together better!

PS: I am estimating that each basket cost approximately $8.00!

Wednesday, March 17, 2010

Happy St. Patrick's Day!

Happy St. Patrick's Day!

This year for St. Patrick's Day I wanted to try something festive for dinner, but I couldn't really come up with anything fun. I ended up serving tortellini pasta with alfredo sauce, peas, and a spinach salad with fruit. Dessert is where I got pretty festive!


Yellow cake with chocolate frosting and rainbow sprinkles! But it's not just any yellow cake...


It's green! I used green food coloring to create a green cake! I love how it looks on the inside with the chocolate frosting and rainbow sprinkles! And it was delicious! Sometimes the traditional yellow cake is the best way to go!

Hope you had a great St. Patrick's Day! Next year I am hoping to be much more festive! I suppose I should do a bit more research on what the Holiday is actually about!

Wednesday, February 10, 2010

Valentine's Day Balls

I saw these in a Martha Stewart magazine (she had done white and silver ones for the New Year) and I thought they would make cute Valentine's decorations in my glass jars. I think they turned out really cute!

Supplies:
  • STYROFOAM balls (I used 4 1.5 inch balls, but you could use bigger ones)
  • 50 mini cupcake papers (or more for bigger balls - use regular cupcake papers for balls bigger than 5 inches) Note: the balls double to triple in size once the papers are all attached.
  • Glue gun with glue sticks
  • Pencil
Instructions:

Take pencil and place the eraser in the center of the cupcake paper. Scrunch the paper up around the pencil. Place a small dab of glue on the paper at the eraser end and press onto STYROFOAM ball. Repeat until ball is covered, placing the papers as close together as you like. The closer together you put them the more you will need, but your balls will look fuller with more papers. The finished result...

And here is a close up of what they look like! Super easy and super fun! Just throw on a movie and you'll be done!