Showing posts with label Dinner. Show all posts

Saturday, February 4, 2012

Easy Baked Ziti

I was recently searching for an easy baked ziti recipe and I came across this yummy dish from Taste of Home filled with cottage cheese instead of ricotta cheese.


I know the picture is not super great, but you get the idea of how delicious and cheesy it is! It was a very simple dish to prepare, and I usually always have the ingredients on hand so that makes it even easier. Pair this with some toasty garlic bread and a side of vegetables and you have a simple, fast, and tasty meal.

Easy Baked Ziti

  • 3 cups uncooked ziti or small tube pasta
  • 1-3/4 cups meatless spaghetti sauce, divided
  • 1 cup (8 ounces) 4% cottage cheese
  • 1-1/2 cups (6 ounces) shredded part-skim mozzarella cheese, divided
  • 1 egg, lightly beaten
  • 2 teaspoons dried parsley flakes
  • 1/2 teaspoon dried oregano
  • 1/4 teaspoon garlic powder
  • 1/8 teaspoon pepper

  • Cook pasta according to package directions. Meanwhile, in a large bowl, combine 3/4 cup spaghetti sauce, cottage cheese, 1 cup mozzarella cheese, egg, parsley, oregano, garlic powder and pepper. Drain pasta; stir into cheese mixture.
  • In a greased 8-in. square baking dish, spread 1/4 cup spaghetti sauce. Top with pasta mixture, remaining sauce and mozzarella cheese.
  • Cover and bake at 375° for 45 minutes. Uncover; bake 5-10 minutes longer.
  • I have the best garlic bread recipe ever, and will be sharing it in an upcoming post, so stay tuned! I'm sure you could always use a meat sauce if you like to add more substance to your meal, although this dish definitely does not need it. And we actually don't eat a lot of meat at our house so I love finding good recipes without it!

    Tuesday, November 15, 2011

    Sweet Mustard Chicken

    A few weeks ago I was watching my friend's kids and saw this recipe open on her computer. I thought it sounded delicious so I decided to give it a go. I love honey mustard sauce, so I figured I would really like this recipe.

    I did however substitute honey mustard for Dijon mustard because the Dijon mustard at the store I was at had white wine in it. I LOVED it with the honey mustard so I may actually just keep using that instead of the Dijon. Next time I have Dijon mustard that is free from white wine I will test it out to see if it is better.

    I served our chicken with yummy mashed potatoes (which I made all by myself for the first time ever - and they were the best mashed potatoes I have ever had, go me!!!) and steamed green beans. The sweet mustard sauce was so tasty paired with the mashed potatoes and green beans. I think it would be even better with asparagus - well, everything would be better with asparagus.

    So, next time you are in the mood for a little chicken, check out this saucy recipe. It will hit the spot!


    Sweet Mustard Chicken Bake

    4 boneless, skinless chicken breast halves

    1/2 cup honey

    1/4 cup Dijon mustard (or honey mustard)

    1/2 cup butter, melted

    1/4 teaspoon freshly ground black pepper


    Preheat the oven to 375 degrees F (190 degrees C). Grease a shallow baking dish.

    In a small bowl, stir together the honey, Dijon mustard, melted butter and pepper. Place chicken in the greased baking dish, and pour the honey mustard sauce over it.

    Bake for 45 minutes in the preheated oven, basting frequently with the sauce, until chicken is firm and juices run clear.

    Thursday, November 10, 2011

    Corn & Cheese Chowder

    This soup is YUMMY! It is a genius creation from The Pioneer Woman. Honestly, when I got the ingredients to make it I thought it would be good, but when we actually sat down to eat it I was amazed at how delicious it was. My husband kept going on and on about how much he loved it. Ree's pictures are a lot prettier than mine, and she served the soup in bread bowls (which I think I will do next time). Check out her photos HERE.

    So next time you have corn you MUST make this soup! Especially now that it is chilly enough out to actually make soup without feeling guilty. (Although, I have never minded making soup in the Summer - soup is just good no matter when you have it!)


    Corn & Cheese Chowder


    4 Tablespoons 1/2 Stick Butter


    1 whole Onion, Chopped


    3 slices Bacon, Cut Into Pieces


    3 whole Bell Peppers, Finely Diced (red, Yellow, Orange)


    5 ears Corn, Kernels Sliced Off


    ¼ cups All-purpose Flour


    3 cups Chicken Stock Or Broth


    2 cups Half-and-half


    1 cup (heaping) Grated Monterey Jack


    1 cup (heaping) Pepper Jack


    ⅓ cups Sliced Green Onions


    Bread Bowls


    Preparation Instructions


    In a large pot, melt butter over medium-high heat. Cook onions for a couple of minutes. Add bacon and cook for another minute or so, then add diced bell peppers and cook for a couple of minutes. Finally, add corn and cook for a minute.


    Sprinkle flour evenly over the top and stir to combine. Pour in broth and stir well. Allow this to thicken for 3 or 4 minutes, then reduce heat to low. Stir in half-and-half, then cover and allow to simmer/thicken for 15 minutes or so.


    Stir in cheeses and green onions. When cheese is melted and the soup is hot, check seasonings. Add salt and pepper as needed.


    Ladle into hollowed out boules and serve immediately.

    Monday, November 7, 2011

    Lemon Fusili with Arugula

    Are you beginning to notice how much pasta we eat around here? I keep feeling like we eat too much. It is usually pasta or Mexican for dinner around these parts. I think this is because we don't eat very much meat. I can't seem to come up with anything meatless that is not pasta or Mexican. Occasionally we branch out and enjoy breakfast foods too. Does anyone have any good meatless recipes? Because I need help in the creativity department with my meals!

    Anyway, this pasta is to die for. I was literally in LOVE with it and wanted to keep eating it all night. Now that I am posting it I am really craving it again. I l.o.v.e. the lemon cream sauce - it is yummy! Do yourself a favor and make this for dinner ASAP. Once you try it you will want to make it again and again.


    Lemon Fusili with Arugula
    Barefoot Contessa via Food Network

    1 tablespoon good
    olive oil
    1 tablespoon minced garlic (2 cloves)
    2 cups heavy cream
    3 lemons
    Kosher salt and freshly ground black pepper
    1 bunch broccoli
    1 pound dried fusilli pasta
    1/2 pound baby arugula (or 2 bunches of common arugula, leaves cut in thirds)
    1/2 cup freshly grated Parmesan
    1 pint grape or cherry tomatoes, halved

    Heat the olive oil in a medium saucepan over medium heat, add the garlic, and cook for 60 seconds. Add the cream, the zest from 2 lemons, the juice of 2 lemons, 2 teaspoons of salt, and 1 teaspoon of pepper. Bring to a boil, then lower the heat and simmer for 15 to 20 minutes, until it starts to thicken.

    Meanwhile, cut the broccoli in florets and discard the stem. Cook the florets in a pot of boiling salted water for 3 to 5 minutes, until tender but still firm. Drain the broccoli and run under cold water to stop the cooking. Set aside.

    Bring a large pot of water to a boil, add 1 tablespoon of salt and the pasta, and cook according to the directions on the package, about 12 minutes, stirring occasionally. Drain the pasta in a colander and place it back into the pot. Immediately add the cream mixture and cook it over medium-low heat for 3 minutes, until most of the sauce has been absorbed in the pasta. Pour the hot pasta into a large bowl, add the arugula, Parmesan, tomatoes, and cooked broccoli. Cut the last lemon in half lengthwise, slice it 1/4-inch thick crosswise, and add it to the pasta. Toss well, season to taste, and serve hot.

    Thursday, November 3, 2011

    Vegetable Lasagna

    Wow! All I really have to say about this lasagna is WOW! It is extremely flavorful and has lots of yummy vegetables inside. This picture really does not do it justice, but the colors in this lasagna are beautiful.


    This is really a delicious and healthy lasagna. You don't even need to add any side dishes because it is so full of nutrients all on its own. Although I love to add bread and fruit just to add variety to our meal! This is a great meal to make in advance (the night before, or the morning of) and stick in the fridge to pull out for dinner. I am guessing it would freeze great as well. I will have to try that out next time. Give this a try - you will not be disappointed and you may even find your children enjoying this sweet lasagna (it does taste very sweet)!


    Vegetable Lasagna

    1 box lasagna noodles
    2 tbsp olive oil
    1 whole medium onion, finely chopped
    4 cloves garlic
    1 red bell pepper, diced
    3 zucchini, diced
    3 yellow squash, diced
    1 can (28 oz) crushed tomatoes
    1/2 cup white wine vinegar (or white balsamic vinegar)
    1/4 cup fresh parsley, chopped
    1/2 tsp kosher salt
    freshly ground black pepper
    1/2 tsp red pepper flakes

    Filling:
    30 ounces ricotta cheese
    2 eggs
    1/2 cup grated Parmesan cheese
    1/4 tsp black pepper
    1 lb. shredded Mozzarella cheese
    extra Parmesan cheese for sprinkling

    Preheat oven to 350 degrees.

    Cook noodles according to package directions. Drain and lay flat to dry on paper towels or clean kitchen towel. Heat olive oil in a large skillet over medium heat. Add onions and garlic and cook for 1 minute. Add diced red peppers and saute for another minute or so. Add squash and zucchini and cook for a few minutes. Pour in white wine vinegar, add salt, pepper, and red pepper flakes and stir. Pour in tomatoes. Stir to combine and let simmer for 20 minutes or so. Stir in chopped parsley.

    In a separate bowl, combine ricotta, eggs, Parmesan cheese, salt and pepper.

    To assemble, spread a little of the vegetable/tomato sauce in a lasagna pan. Layer four cooked noodles in the pan, slightly overlapping them if necessary. Spread 1/3 of the ricotta mixture on the noodles. Top the ricotta mixture with mozzarella. Spoon a little less than 1/3 of the veggie sauce mixture over the mozzarella cheese. Repeat the layering two more times, ending with a large helping of vegetable sauce and sprinkling of Parmesan cheese.

    Bake at 350 degrees, covered in foil, for 20 minutes. Remove foil and continue baking for another 5-10 minutes. Remove from oven and allow to stand for 10 minutes before cutting into squares and serving.

    Serve with your favorite bread!

    Tuesday, October 18, 2011

    Amazing Alfredo Sauce

    If you haven't figured it out by now this blog is not about originality, although some things are original. This blog is simply a place where I keep all of my ideas/recipes so that I can access them easily from anywhere. That way I can make one of my yummy recipes even when I am out of town and do not have my recipe book on hand. Or I can recreate a fantastic craft that I loved.

    Anyway, I found this amazing recipe for Guiltless Alfredo Sauce over at Our Best Bites. It has been my go to sauce for pasta the past 4 months. I make it at least every other week. It is simple, fast, delicious, and a lot healthier than other Alfredo sauces. I love to pair it with roasted asparagus, but it is also great paired with roasted green beans, or roasted zucchini.


    Guiltless Alfredo Sauce

    2 C low-fat milk
    1/3 C (3 oz) low fat cream cheese
    2 T flour
    1 t salt
    1 T butter
    3 garlic cloves
    1 C grated Parmesan cheese

    Place milk, cream cheese, flour, and salt in a blender and blend until smooth. In a non-stick sauce pan, melt butter on med-high heat and add garlic. Let the garlic saute for about 30 seconds, you don’t want to burn it.

    Then add milk mixture to the pan. Stir constantly for about 3 or 4 minutes or until it just comes to a simmer. Keep stirring and let it cook for a few minutes more. It should be much thicker now.

    When it’s nice and thickened remove the pan from the heat. Add the cheese, stir it up and then cover immediately. Let stand for at least 10 minutes before using. It will continue to thicken upon standing. Also, if you have leftovers in the fridge, the sauce will thicken almost into a solid. Just re-heat and add a little milk and it will be back to normal again.

    Thursday, October 13, 2011

    Chicken, Wild Rice & Potato Soup

    This might very well be the very first recipe I have ever posted that is actually one that is technically mine. Of course it was adapted from an original recipe, but I was the one who adapted it! I first tried the original recipe when I was a new mom and my friend, Natalie, brought dinner to us. She made this soup but it originally has mushrooms instead of potatoes. We are not a mushroom loving family so we have altered it to suit our own tastes.


    Doesn't that just look yummy? Well, it's not the best picture ever, but it really is yummy! Soup just screams Fall to me. I am so happy that it has finally cooled down a bit where we live and it even rained the day I whipped this up. I have made this soup many times over the past year and it never disappoints me. Pair it with freshly made wheat bread and you have an amazing dinner.

    Chicken, Wild Rice & Potato Soup

    3/4 cup wild rice
    6 1/2 cups chicken stock/broth
    1 1/2 cups shredded carrots
    1/2 cup chopped onion
    2 cups peeled, diced potatoes
    3/4 cup chopped celery
    2 Tbsp. butter
    2 Tbsp. flour
    1/4 tsp. salt
    1/4 tsp. black pepper
    1 cup whipping cream (you can also use milk)
    2 cups cooked, diced chicken (I bake mine at 350 for about 15-20 minutes. Put salt and pepper on it and cover it with chicken stock/broth to make it extra moist.)

    In a large pot combine rice, 5 cups stock/broth, carrots, celery, potatoes, and onion. Bring to a boil, then reduce heat and simmer for 35-40 minutes, until rice is tender but still chewy. In a small sauce pan, melt butter and add flour, salt and pepper; let this boil for 30 seconds then slowly add in the remaining 1 1/2 cup stock/broth. Boil for 1-2 minutes. Add cream, or milk, and then add mixture to soup pot and stir in chopped chicken.

    This soup makes 6-8 servings. It is also very flexible. You can add as much or as little of any of the vegetables listed (or add mushrooms, zucchini, squash, peas, or green beans). Sprinkle chopped parsley and shredded Parmesan cheese on top to add more flavor and texture.

    Friday, September 23, 2011

    Ratatouille

    A couple of weeks ago I made this delicious dish of Ratatouille. It was absolutely amazing. My 16 month old gobbled it up. He could not get enough. And my husband and I loved it as well. We didn't even have leftovers the next day because we ate the entire thing between the 3 of us. I was so bummed that we ate it so fast that I made it again last week.


    Me making our masterpiece the first time. It got slightly too browned for a good picture after it was baked.


    Our second go at it. I made a bigger batch the second time around. Aren't all of the colors beautiful? The pictures are prettier HERE where the recipe comes from.


    Doesn't that look scrumptious? Here's the recipe:

    Ratatouille’s Ratatouille
    As envisioned by Smitten Kitchen

    1/2 onion, finely chopped
    2 garlic cloves, very thinly sliced
    1 cup tomato puree (such as Pomi)
    2 tablespoons olive oil, divided
    1 small eggplant (my store sells these “Italian Eggplant” that are less than half the size of regular ones; it worked perfectly)
    1 smallish zucchini
    1 smallish yellow squash
    1 longish red bell pepper
    Few sprigs fresh thyme
    Salt and pepper
    Few tablespoons soft goat cheese, for serving

    Preheat oven to 375 degrees F.

    Pour tomato puree into bottom of an oval baking dish, approximately 10 inches across the long way. Drop the sliced garlic cloves and chopped onion into the sauce, stir in one tablespoon of the olive oil and season the sauce generously with salt and pepper.

    Trim the ends off the eggplant, zucchini and yellow squash. As carefully as you can, trim the ends off the red pepper and remove the core, leaving the edges intact, like a tube.

    On a mandoline, adjustable-blade slicer or with a very sharp knife, cut the eggplant, zucchini, yellow squash and red pepper into very thin slices, approximately 1/16-inch thick.

    Atop the tomato sauce, arrange slices of prepared vegetables concentrically from the outer edge to the inside of the baking dish, overlapping so just a smidgen of each flat surface is visible, alternating vegetables. You may have a handful leftover that do not fit.

    Drizzle the remaining tablespoon olive oil over the vegetables and season them generously with salt and pepper. Remove the leaves from the thyme sprigs with your fingertips, running them down the stem. Sprinkle the fresh thyme over the dish.

    Cover dish with a piece of parchment paper cut to fit inside. (Tricky, I know, but the hardest thing about this.)

    Bake for approximately 45 to 55 minutes, until vegetables have released their liquid and are clearly cooked, but with some structure left so they are not totally limp. They should not be brown at the edges, and you should see that the tomato sauce is bubbling up around them.

    Serve with a dab of soft goat cheese on top, alone, or with some crusty French bread, atop polenta, couscous, or your choice of grain.

    Note: I put this over brown rice and it was delish!

    Tuesday, June 28, 2011

    Sausage & Egg Megmuffins

    In our family we enjoy breakfast for dinner quite often (usually about once per week). Our old standbys are breakfast burritos, pancakes, or breakfast sandwiches. So here's what our sausage, egg mcmuffins look like Meagan style (hence the name Sausage & Egg Megmuffins, haha).


    We cook up a sausage patty; my famous most delicious, secret recipe scrambled egg patty (really not that secret - just add a little milk and cheese); slice a thick piece of Tilamook cheddar cheese; and pile it all on a toasted, buttered, sourdough English muffin. That's what I call a good breakfast sandwich. You could also add sliced bell peppers and avocado to spice/health it up.

    I usually pair these delicious sandwiches with a big bowl of cut up fruit. This is yet another quick and easy meal at our home. Hope you enjoy some breakfast for dinner soon.

    Tuesday, February 15, 2011

    Most Delicious Enchiladas

    Mel's Kitchen Cafe is one of my favorite food websites. Every recipe over there that I have ever tried is AMAZING. These delicious enchiladas fit into that AMAZING category. We had them last night for our super late, Valentine's Day feast. And I ate them again today for lunch, YUM!


    I could not believe how delicious they were. And I had a hard time getting myself to stop popping bites into my mouth (even after I was super full). I used a Mexican blend of cheeses that I had on hand instead of the Monterey Jack cheese, but I think they turned out great anyway. One thing I would change next time is the amount of onion. I don't mind onions unless I can REALLY taste them. There was more of an onion flavor than I care for so in the recipe below I am changing the amount from the original. Check out the original recipe (with better photos) HERE.

    Creamy Green Chile Chicken Enchiladas

    Filling:
    3 cups cooked, chopped chicken
    2 (4 oz.) cans of green chiles, lightly drained
    1 package (8 oz.) cream cheese, cubed and softened
    1 can white or black beans, rinsed and drained (you can really use any type of bean you prefer here)

    Sauce:
    2 tablespoons butter
    1/4 cup chopped onion (about 1/4 medium onion)
    2 tablespoons flour
    1/3 cup chicken broth
    ¼ cup milk
    ¼ teaspoon salt
    ¼ teaspoon pepper
    1 can (7 ounce) green chile enchilada sauce
    ½ cup sour cream

    8 ounces (about 2 cups) Monterey jack cheese, shredded
    8 medium (soft taco size) flour tortillas
    Handful of chopped fresh cilantro

    Preheat oven to 375 degrees.

    In a medium bowl, combine the softened cream cheese and green chiles. Mix well. Add the chicken and black beans. Mix to combine. Set aside.

    In a large nonstick skillet, melt the butter over medium heat. Add the onion and cook, stirring occasionally, until the onion softens and starts to turn translucent, about 3-4 minutes. Sprinkle the flour over the onions and stir well. Cook for 1 minute, stirring. Slowly whisk in the chicken broth and milk. As you whisk and the mixture cooks, the flour will get less lumpy around the onions and the mixture will become smooth. Cook over medium heat until the mixture is bubbling and has thickened, about 4-5 minutes. Remove the skillet from the heat and stir in the enchilada sauce and sour cream.

    Lightly grease a 9X13-inch baking dish. Spread about 1/4 cup of the sauce on the bottom of the dish. Fill each tortilla with about ½ cup of the chicken/cream cheese filling. Top with a small handful of shredded cheese, a couple tablespoonfuls for each enchilada. Save at least 1/2 cup cheese for the top of the enchiladas. Roll the tortillas up and place seam side down in the prepared baking dish. Continue filling enchiladas until the dish is full (I can easily fit 8 enchiladas in one pan).

    Pour the white sauce over the top of the enchiladas. Top with remaining cheese. Bake for 20-30 minutes until the enchiladas are bubbling, hot and lightly browned. Sprinkle fresh cilantro over the top and serve.

    Monday, September 20, 2010

    Manicotti

    This Italian dish is my absolute favorite to make and eat. I use it as my go to lasagna even though it is called Baked Manicotti. I love the addition of red pepper flakes. It really gives it a kick. I hesitate to ever make another lasagna recipe in my life. And the homemade sauce would be great even for spaghetti or baked ziti. Another thing I love about this recipe is that I can make it a day ahead and have it in the refrigerator. That makes my Sunday meal preparation much easier and more relaxing and Sabbath worthy.


    Recipe from Melanie at My Kitchen Cafe.

    Tomato Sauce
    1 28-ounce can diced tomatoes (in juice)
    1 28-ounce can crushed tomatoes
    2 tablespoons extra-virgin olive oil
    3 medium cloves garlic, finely minced
    1/2 teaspoon red pepper flakes, optional
    1/2 teaspoon salt
    2 teaspoons dried basil

    Cheese Filling and Pasta
    3 cups part-skim ricotta cheese
    4 ounces grated Parmesan cheese (about 2 cups)
    8 ounces shredded mozzarella cheese (about 2 cups)
    2 large eggs , lightly beaten
    3/4 teaspoon table salt
    1/2 teaspoon ground black pepper
    2 tablespoons chopped fresh parsley leaves (or 2 1/2 teaspoons dried parsley)
    2 teaspoons chopped fresh basil (or 1 teaspoon dried basil)
    16 no-boil lasagna noodles

    Adjust oven rack to middle position and heat oven to 375 degrees.

    Heat oil, garlic, and pepper flakes (if using) in large saucepan over medium heat until fragrant but not brown, 1 to 2 minutes. Stir in tomatoes, basil and 1/2 teaspoon salt and simmer until thickened slightly, about 15 minutes.

    In a medium bowl, combine ricotta, 1 cup Parmesan chese, mozzarella cheese, eggs, salt, pepper, and herbs; set aside.

    To assemble, pour 1 inch boiling water into 13 by 9-inch baking dish, then add noodles one at a time. Let noodles soak until pliable, about 5 minutes, separating noodles with tip of sharp knife to prevent sticking. Remove noodles from water and place in single layer on clean kitchen towels; discard water in baking dish and dry baking dish.

    Spread bottom of baking dish evenly with 1 1/2 cups sauce. Spread 1/4 cup cheese mixture evenly onto bottom three-quarters of each noodle (with short side facing you), leaving top quarter of noodle exposed. Roll into tube shape and arrange in baking dish seam side down. (You should be able to fit 8 manicotti in each row, allowing all 16 to fit in the dish). Top evenly with remaining sauce, making certain that pasta is completely covered.

    Cover manicotti with aluminum foil. Bake until bubbling, about 40 minutes, then remove foil. Sprinkle manicotti evenly with remaining 1 cup Parmesan. Bake until cheese is browned and bubbly, about 6-7 minutes. Remove from oven and let sit for 15 minutes before serving.

    The manicotti can be prepared right up until the baking step then covered with a sheet of parchment paper, wrapped in aluminum foil, and refrigerated for up to 3 days or frozen for up to 1 month. (If frozen, thaw the manicotti in the refrigerator for 1 to 2 days.) To bake, remove the parchment, replace the aluminum foil, and increase baking time to 1 to 1 1/4 hours.

    Sunday, April 4, 2010

    Happy Easter!!!

    This year we hosted an Easter dinner at our little apartment. It was a lot of fun to gather with friends (since family is too far away) and celebrate Easter with what our friends like to call "Feaster." Everybody brought food to share and it turned out wonderfully!


    Our "dining room" is pretty small but our table can expand to seat 10 (possibly even 12 but we've never tried it). So we had this huge table crammed into a tiny little space! Fortunately it all just barely fit long enough for us to enjoy our meal.


    To minimize dishes and add color to the table I bought paper plates to put on top of the dinner plates. We used the paper plates for the fruit salad and the veggies with dip. Then we tossed them out and moved on to the main course. We had Boneless BBQ Ribs. I love making them but only do it about once a year. It is the easiest recipe ever! Next time I make it I will remember to take pictures.


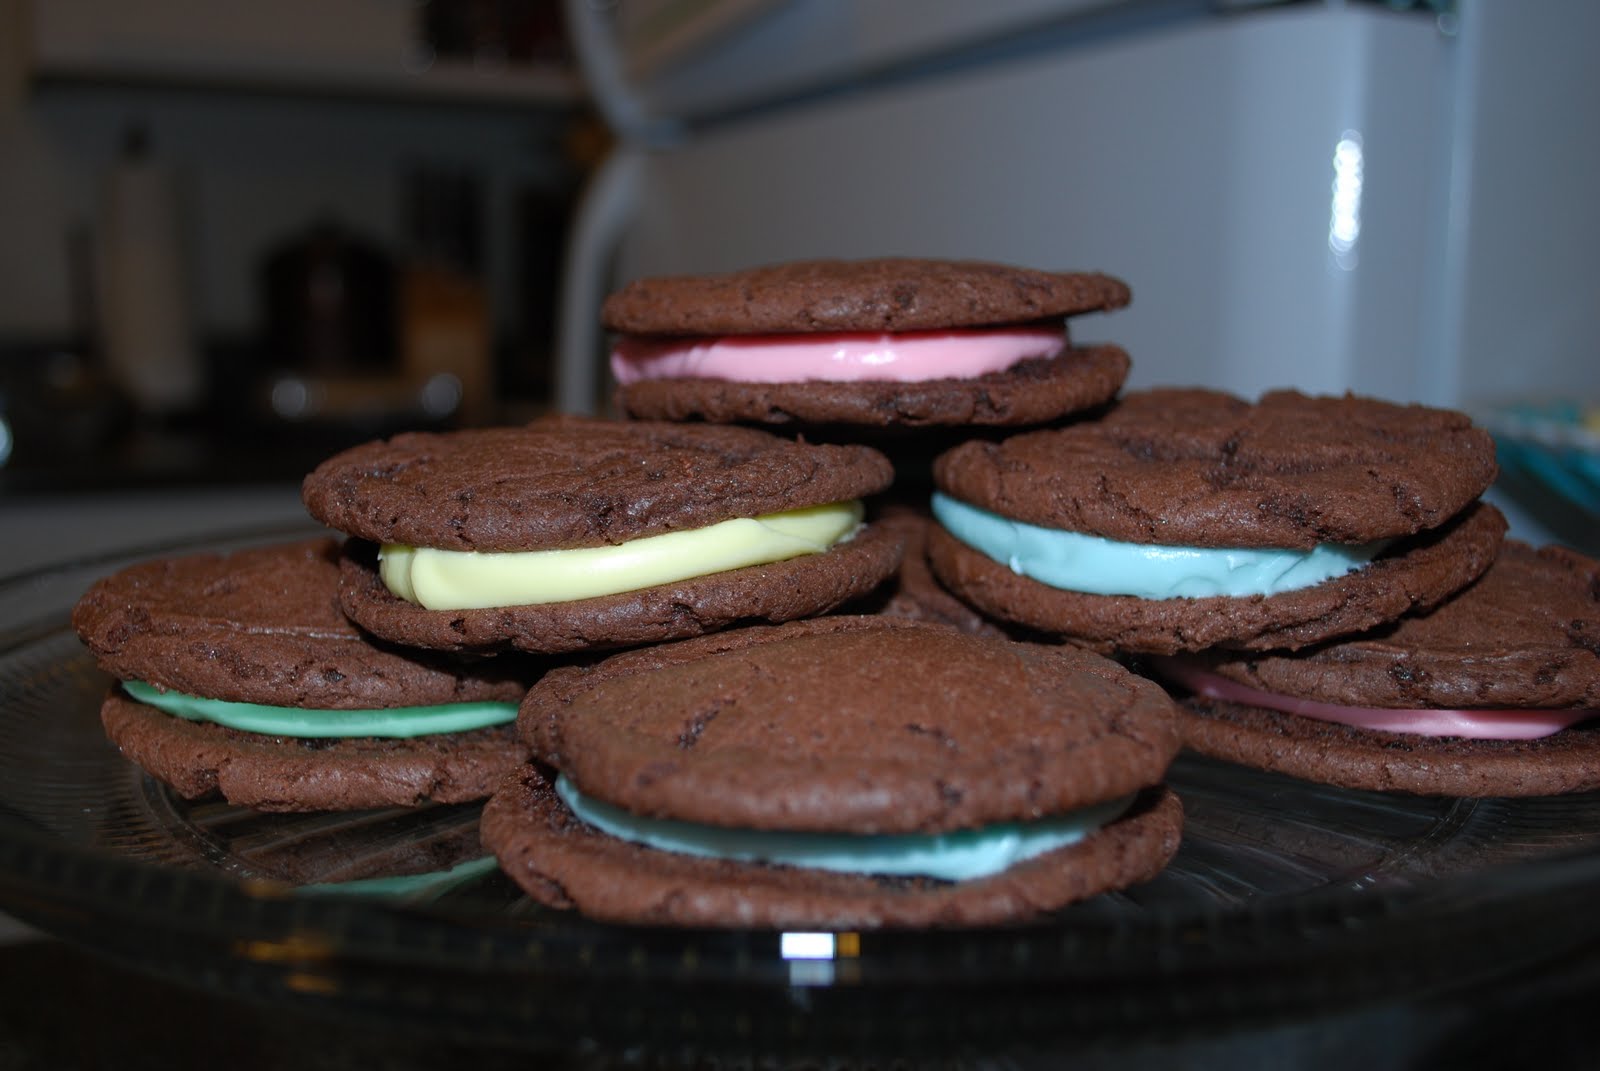
    And of course we had to have a variety of desserts. I made Homemade Oreos and added some food coloring to the frosting to make them more Eastery. As always they were a huge hit. Some of our friends brought sugar cookie sandwiches with frosting in the middle and a delicious key lime pie. Thanks to everyone who participated and came to celebrate "Feaster" with us! It was a blast!

    Hope you all had a wonderful Easter!

    Wednesday, March 3, 2010

    Winter Vegetable Soup

    There's nothing like a bowl of hot soup on a cold and rainy day. We were privileged to have one of those cold and rainy days today so I whipped up a batch of this delicious veggie soup! My grandmother gave me this recipe, and after some minor changes I must say that it is the best vegetable soup in the world. It is so flavorful! Hope you enjoy!


    Winter Vegetable Soup (10 servings)


    2 tbsp olive oil

    2 onions, finely chopped

    1 tsp minced garlic

    1 28oz can diced tomatoes

    6 cans (84 ounces) vegetable broth

    1 stalk celery, washed & sliced

    6 large carrots, peeled and cut in ½ inch cubes

    1 15oz can of garbanzo beans

    2 cups fresh or frozen green beans

    1 cup fresh zucchini, sliced

    1 tsp salt

    1tsp freshly ground pepper

    1 tsp dried basil, minced


    In a large pot, heat oil over medium heat. Add onions and sauté for about 8 minutes. Add the garlic and sauté 2 to 3 minutes more. Add the tomatoes, vegetable broth, celery and carrots. Bring to a boil. Add garbanzo beans, green beans, zucchini, salt, pepper and basil. Return to a boil. Lower the heat and simmer for 30 to 45 minutes. Let’s eat!

    Monday, February 15, 2010

    Cravings

    For those of you who are pregnant, or have ever been pregnant, you will probably understand the feeling of CRAVING something specific. With this pregnancy I have found that my constant CRAVING is green apples. I cannot get enough of them. They are an everyday thing as of late! While I was looking at delicious food blogs I came across this idea from Picky Palate.


    She used different ingredients for her sandwich, but I just used what I had and it was incredible. Slice a quarter of an apple (green or red, whichever is your favorite) as thin as you possibly can. Grate your favorite kind of cheese (I used Tilamook Colby Jack flavor). Butter the outsides of two slices of bread (I used a multigrain and it was delicious). Place one slice, butter side down in your skillet. Layer with grated cheese, sliced apples, then another light layer of grated cheese. Add second piece of bread with butter side up and brown on each side of the sandwich. Cut in half and serve with Honey Dijon Mustard and the remainder of your apple! Yum, yum, yum! I think I need one right now!

    PS: If you're like me and were not aware that dijon mustard usually has alcohol in it then I would like to warn you they do. If you are okay with this then no problem, but due to my religious beliefs I do not consume any alcohol. Therefore, I searched and found one brand/type of dijon mustard that does not contain alcohol. It is French's Honey Dijon Mustard. Most store bought salad dressings also have alcohol in them so make sure to check if you do not wish to eat foods with alcohol in them.

    Saturday, February 13, 2010

    Asparagus Chicken

    I made this yummy recipe a couple of weeks ago and wanted to share it with everyone! It was absolutely delicious!

    Chicken with Asparagus

    4 chicken breasts - pounded out
    16 pieces of asparagus - cut off ends and blanch (steam for 2 minutes then rinse in cold water)

    Mix together:
    1/4 cup butter, melted
    1/4 cup Dijon mustard
    1/4 cup white wine vinegar
    2 garlic cloves, minced

    Mix together:
    3/4 cup seasoned bread crumbs
    1/2 cup grated parmesan cheese
    2 tablespoons fresh parsley, finely chopped

    Dip chicken in butter mixture. Wrap chicken breast around 4 pieces of asparagus and secure with a toothpick. Roll in bread crumb mixture. Bake in greased, glass pyrex dish at 350 degrees for 30 minutes. Make one package of Knorr hollandaise sauce and drizzle over the chicken breasts before serving.

    Thursday, January 28, 2010

    Celebration Chicken

    What a treat this meal is. This chicken turns out creamy, cheesy, and practically perfect every time I make it. It is definitely a crowd pleaser.


    Celebration Chicken

    Lay 10 boneless, skinless chicken breasts in 9x13 inch casserole dish (I use frozen but fresh also works)
    Season with pepper, onion salt, and paprika

    Mix together:
    1 can cream of chicken soup
    3/4 cup sour cream
    3/4 cup mayonnaise
    1 tbsp minced dry onion
    1 cup grated mild cheddar cheese

    Pour mixture over seasoned chicken and bake at 275 degrees for two hours. Serve over rice with a side dish of your favorite cooked veggies.

    I make this about once a month and it is a great left-over meal through out the week. I also love that it doesn't take long to prep before I can throw it in the oven. Hope you enjoy!

    Tuesday, January 26, 2010

    Dipping Pizza


    2 C luke warm water
    2T yeast
    1T sugar
    1t salt
    4C flour

    Mix water, salt, sugar, yeast, and a little of the flour. When it starts to bubble, you can put in the rest of the flour. Grease a cookie sheet and flour your hands. Push the dough down into the bottom of the cookie sheet (until it's flat and fairly thin). Cover with any toppings you want (no sauce though). I usually put mozzarella and parmesan cheese with pepperoni. Cook at 350 for 30 minutes maximum. Check at about 20 minutes to see how it's doing. After baked cut and dip into your favorite spaghetti sauce (or ranch dressing).

    Sunday, January 24, 2010

    Artichoke Chicken

    This recipe is super easy and super delicious! It is one of our favorites.


    1 15 oz. can artichoke hearts (drained & chopped)

    ¾ cup grated parmesan cheese

    2/3 cup mayonnaise

    1 pinch garlic pepper or 1 clove minced garlic


    Mix artichokes, cheese, mayo, and garlic. Grease baking dish & put frozen chicken on the bottom. Cover with mixture and bake at 375 for 30 minutes (uncovered). Serve with rice.