I saw THIS adorable tutorial on how to beautify cloth diapers and turn them into burp cloths. I knew that I wanted to make them as gifts for family and friends, as well as make some for our own little one. These were my first attempt:
I made some for my sister-in-law who just had a darling little baby girl. And I also made a couple for one of my friends who also just had a baby girl! I absolutely love the fabric and am saving the rest to use if I ever have a little girl of my own!
These cookies are seriously the BEST sugar cookies I have ever made (or bought probably). I tried the almond version this time, but am so excited to make the lemon version next time. If you love sugar cookies like I do then you have to try this super easy recipe. I found it over at The Sisters Cafe!
Almond (or Lemon) Sugar Cookies
1 cup butter, softened
3/4 cup sugar
1 tsp. almond OR lemon extract
2 cups flour
1/2 tsp. baking powder
1/4 tsp. salt
Glaze: 1 1/2 cup powdered sugar, 1/2 tsp. almond OR lemon extract, 4-5 tsp. milk
Preheat oven to 400 degrees. Mix butter, sugar and extract in a large bowl. Mix well, about 1 to 2 minutes.
Add remaining ingredients. Beat 1 to 2 more minutes. Roll dough into 1 inch balls. Place 2 inches apart on cookie sheet and flatten balls to 1/4 inch thickness with the bottom of a floured glass dipped in sugar.
Bake at for 7-9 minutes or until edges are very lightly browned. I like mine almost under-baked, remember they stiffen up as they cool. Cool 1 minute.
Stir together glaze ingredients with a wire whisk. Decorate cooled cookies with glaze and sprinkles.
I saw THESE yummy mint chip cookies on Picky Palate and thought they would be fun to try out! They are absolutely delicious! And don't worry, the mint flavor is not overbearing. It is absolutely perfect!
I finally figured out what to do for a seat cushion on our rocking chair! I found a CUSHY seat pad at Cost Plus and made a slipcover for it! It was very simple to make and I think it turned out great. Now our rocking chair is PERFECT and COMFORTABLE for all of those readings, late night feedings, and rocking our little one to sleep.
Here you can see the glossy finish that my husband added!
A close up of the seat cushion!
Gearing up for story time!
And preparing for the late night feedings and rockings to sleep!
I have been doing finishing touches on our baby's nursery and one of the things I wanted to do was buy baskets for his toys and make cute basket liners to tie in nursery colors. I really love how they turned out and I love the fabric.
Now he has toys and books ready to go!
A close up of the liners!
I am also using this same fabric for my seat cushion on the rocking chair (coming up soon)! And we are thinking about using this fabric for the bassinet skirt and bumper pad! I can't wait to get it all finished and see the nursery complete!
I used THIS tutorial, for the liners, from "Make It and Love It." I found it last summer and made these...
for my snack baskets in the kitchen. Keep in mind that we live in an apartment so that is why we have our food storage out in the open for everyone to see. I at least tried to make it look as cute as I could. Of course how cute can you really make cans of food look?
I saw this delicious recipe from Your Homebased Mom and knew that I had to try it! I love poppy seed anything, but especially lemon poppy seed bread! It was delicious! We kept two mini loaves and gave away the other two! I think 4 loaves was a bit much for just me and my husband!
Lemon Poppy Seed Bread
Land O’Lakes Best of Baking Recipe Collection
2 1/4 C all purpose flour
1 1/4 C sugar
1 C butter, softened
3/4 C milk
3 eggs
2 Tbsp poppy seeds
1 Tbsp freshly grated lemon peel
1 1/2 tsp baking powder
1 tsp salt
Glaze
1/2 C sugar
3 Tbsp butter, melted
4 tsp lemon juice
Heat oven to 350 degrees. Grease bottom only of four (5 1/2 x 3 inch) mini loaf pans. Set aside.
Combine all bread ingredients in large bowl. Beat at medium speed, scraping bowl often until well mixed.
Spread batter into prepared pans. Bake for 30-40 minutes or until toothpick inserted in center comes out clean.
Stir together all glaze ingredients in small bowl. Drizzle over warm bread loaves. Cool 10 minutes and remove from pans.
For the past few months we have been searching for a rocking chair for our nursery. We finally found one on Craigslist for the right price ($25)! However, it was bright red. We snatched it up and decided we would sand it down and paint it green! Fortunately for us, my mother-in-law knew about a specific Primer you can use instead of sanding everything down. We found it and my husband got to work.
We forgot to take a Before picture so we got one before we finished the primer.
After the Primer coat!
All green now! We love the color and how it turned out! Now we have a beautiful rocking chair to rock our little guy to sleep! We also put a gloss coat on the top to finish it off, but I haven't taken a picture of it in the nursery yet. Now it just needs a nice, soft cushion to make it perfect! Anyone know how to make a seat cushion?
Growing up my mom used to make these delicious pizza sandwiches! They are super easy and absolutely delicious!
Take two slices of bread and spread pizza or spaghetti sauce on one side of each slice. Layer mozzarella cheese and your favorite pizza toppings (I like plain pepperoni because we always have it on hand). Then put the two sides together, and spread butter on the outsides of the sandwiches. Grill in a sandwich maker, or on a griddle like a grilled cheese sandwich.
Serve with sliced fruit and veggies and dip! Enjoy!!!
I finally finished and hung the Alphabet letters in the nursery! They turned out so cute and I am so excited about them. Every time I walk into the baby's room I smile because they look so darling on the wall!
Now the other walls need some serious help in comparison. Boring, blank, white walls just won't do next to these...
Sorry the lighting is not fantastic. Once the entire room is finished we will try to take some nice photos with natural sunlight and everything!
For our fun Easter celebration I really wanted to come up with a fun activity we could all do after dinner. I thought about dying eggs but decided that would be too messy with little kids that were coming so we decided to frost sugar cookies instead. There weren't too many adults that frosted cookies (mostly they were just chatting), but the one little three year old we had attending went to town with the frosting. It was a good trial run for me to learn how children react to frosting cookies!
These are just a few of the shapes that we used! Flowers, eggs, bunnies, butterflies & ducks. They turned out really cute on top of tasting delicious.
This recipe for sugar cookies is incredible. They have a little bit of lemon extract in them so they have a subtle lemon flavor. Combined with the frosting from THESE homemade oreo cookies the sugar cookies turned out heavenly! However, I am still searching for a lemon frosting to go with this recipe. I think that would make them the best sugar cookies ever invented. Anyone have a lemon frosting recipe?
Sugar Cookies
1 cup butter – softened
1 cup granulated sugar
3 eggs, beaten
3 ½ cups flour
3 tsp baking powder
½ tsp lemon extract
½ tsp almond extract
Cream butter, sugar and eggs. Add dry ingredients and extracts. Chill dough one hour, then roll to ¼ inch thick and cut with cutter on floured board. Place on cookie sheet and bake for 10 minutes at 350 degrees. When cool, frost or glaze.
This year we hosted an Easter dinner at our little apartment. It was a lot of fun to gather with friends (since family is too far away) and celebrate Easter with what our friends like to call "Feaster." Everybody brought food to share and it turned out wonderfully!
Our "dining room" is pretty small but our table can expand to seat 10 (possibly even 12 but we've never tried it). So we had this huge table crammed into a tiny little space! Fortunately it all just barely fit long enough for us to enjoy our meal.
To minimize dishes and add color to the table I bought paper plates to put on top of the dinner plates. We used the paper plates for the fruit salad and the veggies with dip. Then we tossed them out and moved on to the main course. We had Boneless BBQ Ribs. I love making them but only do it about once a year. It is the easiest recipe ever! Next time I make it I will remember to take pictures.
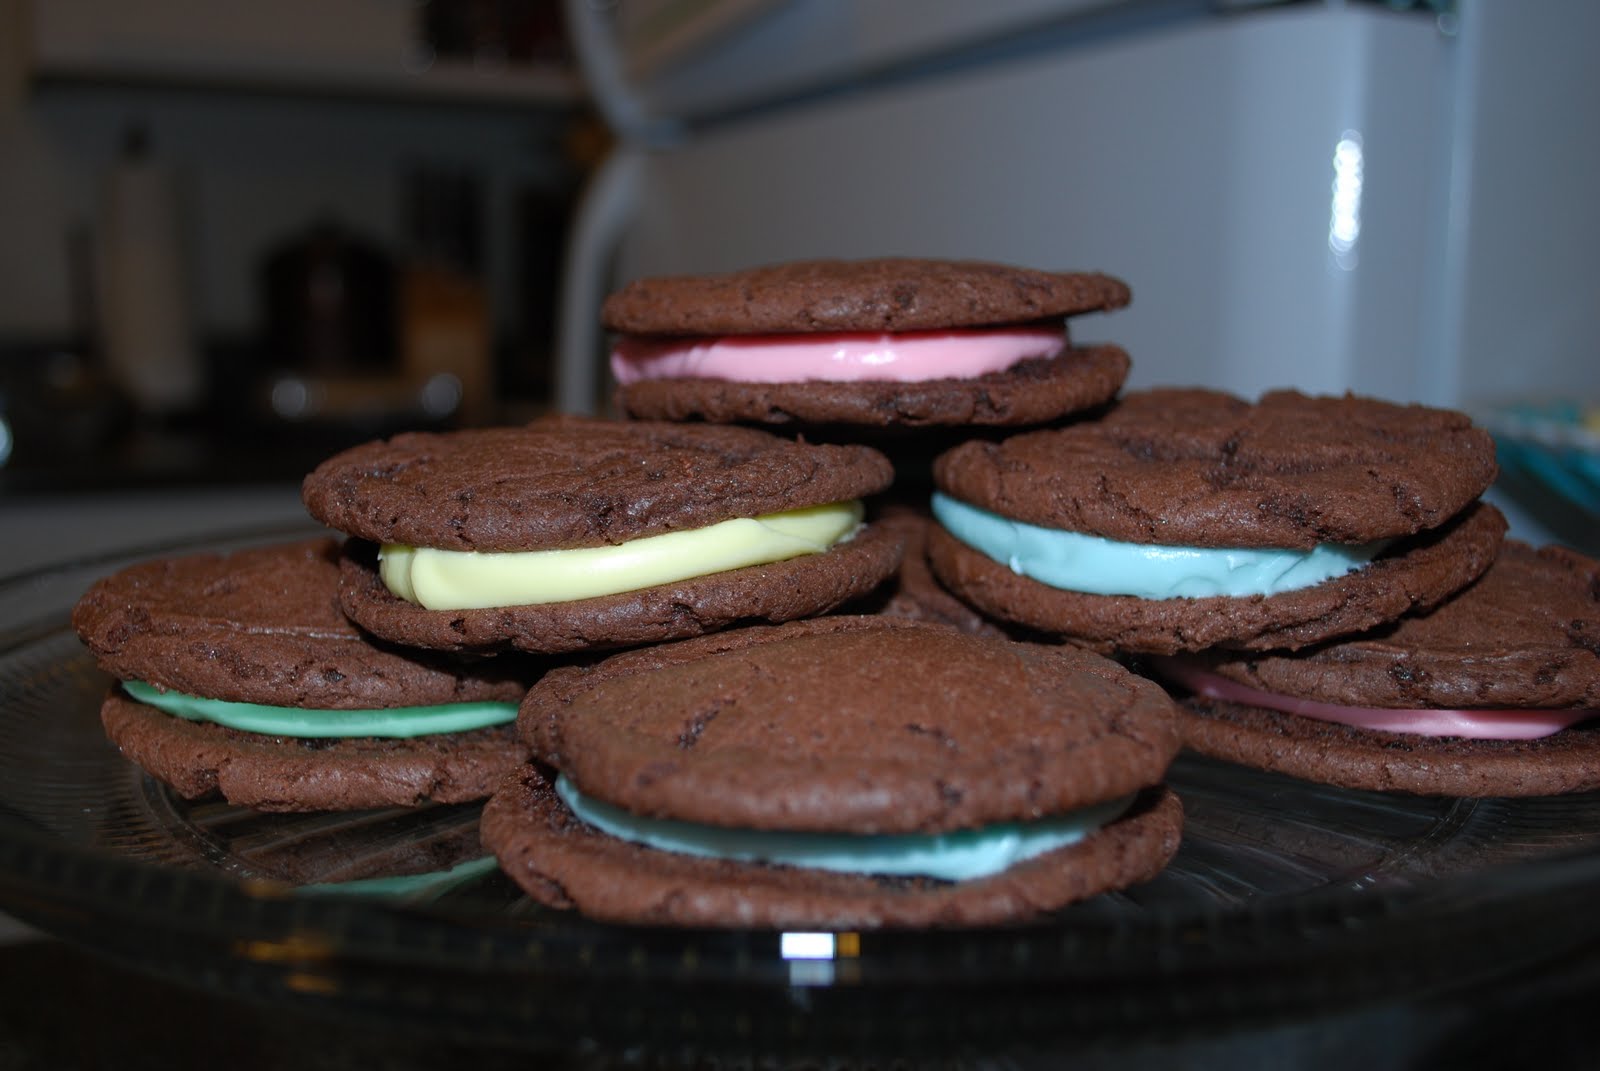
And of course we had to have a variety of desserts. I made Homemade Oreos and added some food coloring to the frosting to make them more Eastery. As always they were a huge hit. Some of our friends brought sugar cookie sandwiches with frosting in the middle and a delicious key lime pie. Thanks to everyone who participated and came to celebrate "Feaster" with us! It was a blast!
I saw THESE beautiful Easter Baskets on the Moda Bake Shop website. I completely fell in love with them and knew that they were the project I was waiting for! Vanessa from V and Co. was the genius behind the design.
I made some minor adjustments to the tutorial. Instead of hand sewing the entire basket I began to get impatient and decided I would try using a glue gun! It was so much quicker and I think they will hold up longer because I used the glue gun. I also didn't want to purchase a honey bun (because I think they are too expensive) so I went to the fabric store and purchased my own fabrics and cut them out myself. I bought 5 different fabrics for each basket and cut out 8 strips, measuring 44" x 1 1/2", from each fabric. I actually bought 1 yard of each type of fabric, but I only used 1/3 yard for each basket. Then I had 3 left over strips from each fabric so I will definitely be making more baskets once we have our little guy and hopefully other children as well.
Anyway, here's the "blue" basket for my husband! Our baby boy's will be the same blue and green color scheme.
And here's my girly version! I used the same green polka dot fabric in both baskets to help tie them together better!
PS: I am estimating that each basket cost approximately $8.00!
If you like caramel apples then you have to try this beauty! It is extremely simple to make and extraordinarily delicious!
Ingredients: Green Apples (as many as you want to cover) Caramel Sheets (or I prefer homemade caramel) White Chocolate Chips Cinnamon Sugar Popsicle Sticks Wax Paper
Directions: Stick a popsicle stick through your apple to make it easier for dipping. You may have noticed that I didn't use any sticks (I was just extra careful). Use homemade caramel (straight from the hot pan), melted caramels, or store bought caramel sheets to cover your green apple. Set on a sheet of wax paper on your counter. Let dry completely if using homemade caramel or melted caramels. Melt white chocolate chips (a 12 ounce bag should be good for 2-3 apples) in a double boiler. Dip caramel apple into the melted white chocolate and use a spatula to make sure it is completely covered. Immediately sprinkle cinnamon sugar all over the outside while the chocolate is still melted. Set on wax paper and let cool completely. Mine only took about 20 minutes to set up! Slice, eat, and ENJOY! These can be stored in the refrigerator for a couple of days if you want to save a few for later enjoyment!
I finally finished the bumper for our little guys' crib! I love how it turned out and I have to admit that I am especially proud of myself on this project. There are definitely a lot of mistakes, but none of them are really visible to the naked eye. Now the crib is all set up with crib skirt, crib sheet, and crib bumper attached! Only the quilt to add and the crib set will be complete.
Front view of the crib all ready to go!
And here is a better view of the bumper! You can kind of see on the left side that there are pockets on the sections that cover the ends of the crib. I love these pockets and I look forward to using them for stashing books and toys when he is older!
This year for St. Patrick's Day I wanted to try something festive for dinner, but I couldn't really come up with anything fun. I ended up serving tortellini pasta with alfredo sauce, peas, and a spinach salad with fruit. Dessert is where I got pretty festive!
Yellow cake with chocolate frosting and rainbow sprinkles! But it's not just any yellow cake...
It's green! I used green food coloring to create a green cake! I love how it looks on the inside with the chocolate frosting and rainbow sprinkles! And it was delicious! Sometimes the traditional yellow cake is the best way to go!
Hope you had a great St. Patrick's Day! Next year I am hoping to be much more festive! I suppose I should do a bit more research on what the Holiday is actually about!
Approximately 10 weeks from today our house will be in need of this beautiful crib...
Which will be arriving next week! I have been a busy bee working on the bedding! It was so much cheaper for me to sew the bedding than it would have been to purchase a set. Besides, it was so much fun to custom design the nursery with colors and fabrics that I loved!
Today I finished the crib skirt! I love how it turned out! Of course it will look so much better once it is actually on the crib, but here is a peek of what you will see in a little over a week:
I am loving my alphabet letters that I am working on for our nursery! They are turning out so cute! I can't wait until they are all finished and up on the wall! Once the crib arrives next week we can put the room together. 10 weeks and counting!
My church has a play group every week for the moms and kids to get together and hang out! Once a month I teach a "Music & Motion" class for this playgroup. We have done lots of fun activities, even though it is tough with 25+ kids ranging from ages 10 months to 4 years. Today was beanbag day! I whipped up these fun beanbags last night! I think they turned out super cute and they were extremely easy.
I was pleasantly surprised today that beanbags could entertain children for an hour or more! What a great toy! I think I will just make a bunch of different shaped beanbags for our little guy on the way instead of buying toys.
I actually filled mine with rice instead of beans and I think it works a lot better! Now I have beanbags on hand for kids to play with when they're at our house!
PS: If you are interested in making beanbags but aren't sure what you would do with them then let me know! I have tons of games/activities to do with beanbags to help get your kids' wiggles out!
Tired of those plain old brownies? Want to spruce them up a bit? Try this recipe! It is delicious, with fudge-like brownies sandwiched between a crunchy oatmeal and M&M crust. The recipe calls for miniature M&M candies but I used regular ones because I had them in my cupboard. I think the miniature ones would be even better! These would be perfect for any Holiday treat if you used Holiday M&Ms.
M&M Oatmeal Brownies
1 ½ cup quick cooking oats 1 cup M&M miniature candies ½ cup flour ½ cup brown sugar ½ tsp baking soda ½ cup butter, melted 1 package fudge brownie mix
Preheat oven to 350°F. Combine the first 6 ingredients; mix well. Set aside a cup of mixture for topping. Pat remaining mixture into greased baking pan. Prepare brownie mix according to package directions. Spread over M&M mixture. Sprinkle with reserved M&M mixture. Bake 25-30 minutes. Cool and cut into squares.
There's nothing like a bowl of hot soup on a cold and rainy day. We were privileged to have one of those cold and rainy days today so I whipped up a batch of this delicious veggie soup! My grandmother gave me this recipe, and after some minor changes I must say that it is the best vegetable soup in the world. It is so flavorful! Hope you enjoy!
Winter Vegetable Soup (10 servings)
2 tbsp olive oil
2 onions, finely chopped
1 tsp minced garlic
1 28oz can diced tomatoes
6 cans (84 ounces) vegetable broth
1 stalk celery, washed & sliced
6 large carrots, peeled and cut in ½ inch cubes
1 15oz can of garbanzo beans
2 cups fresh or frozen green beans
1 cup fresh zucchini, sliced
1 tsp salt
1tsp freshly ground pepper
1 tsp dried basil, minced
In a large pot, heat oil over medium heat. Add onions and sauté for about 8 minutes. Add the garlic and sauté 2 to 3 minutes more. Add the tomatoes, vegetable broth, celery and carrots. Bring to a boil. Add garbanzo beans, green beans, zucchini, salt, pepper and basil. Return to a boil. Lower the heat and simmer for 30 to 45 minutes. Let’s eat!