Monday, January 30, 2012

Andes Mint Fudge - Not Just for the Holidays!

Since I didn't get around to posting Holiday things in December I am going to do a couple of catch up posts. We had a lot of sickness in our family the first couple of weeks of December so I spent my time taking care of my poor sick little boy instead of baking for neighbor treats. By the third week of December I was really getting the baking bug so I whipped up some easy fudge to put us all in the Christmas spirit.


I found this fudge over at MADE. It was a guest post during her Christmas "Sweets & Treats" countdown. I loved the idea of how simple it was and I wanted to test it out to see if it was really good.


And it definitely was! Thankfully I gave most of it away, otherwise I probably would have eaten it all myself. Here's the recipe:

1 bag chocolate chips (the original recipe calls for semi-sweet, but I ALWAYS prefer milk)
1 bag Andes Mint chips
1 can sweetened condensed milk

Mix it all in a bowl, pop it in the microwave for 3 minutes on high. I stirred it around about halfway through. Then pour it into an 8x8 or 9x9 greased baking dish. Let it set up for a few hours (or put it in the fridge until it's set up), cut into cubes, and enjoy.

Fudge is usually something I would only make at Christmas time, but since this recipe is so easy and super good I think I will be making it more than once a year. I will admit that this fudge is not better than my original "Fantasy Fudge" recipe, but it sure comes close given how simple it is to make. Next time I make my original fudge recipe I will share it on the blog.

Saturday, January 28, 2012

Ballerina Doll

As promised, here is more information about the doll I made for my niece's birthday gift. I used the Jo Doll pattern, from the etsy shop "Bit of Whimsy Dolls." I loved the pattern, it was great! And I am excited about making more dolls in the future for gifts, and hopefully for my own little girl someday (if we are ever blessed with a little girl).


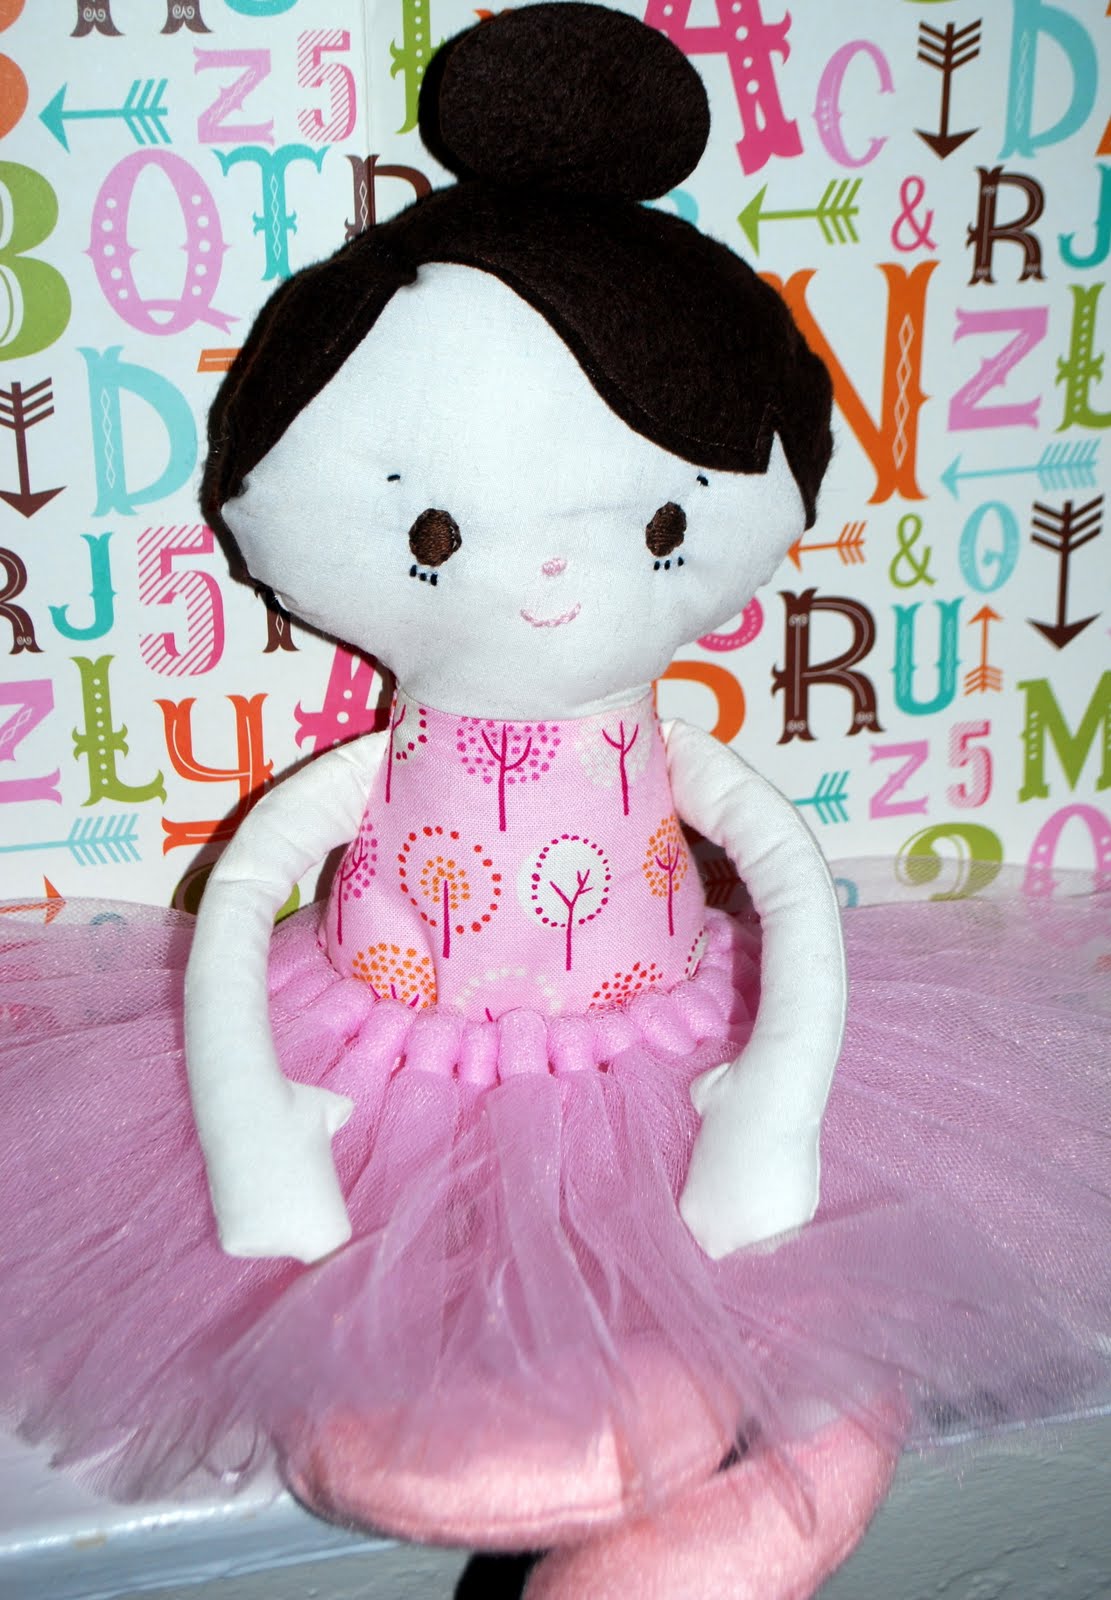
I followed the pattern the whole way through, except that I changed the hair shape and created a bun instead. Then I add a little tulle skirt. It is actually a rather big tulle skirt for such a little doll, but I think it is super fun. It is also a removable skirt so she could always take it off if she wanted.


Another variation I made on the pattern is that I added little ballet slippers made from felt and ribbon. I just drew up a little shoe pattern, cut it out of felt, and sewed it onto the little doll legs before I did any of the sewing from the pattern. Then I tied up the ribbon the way that you tie point shoes (lucky for me I have done my fair share of dancing so I know all about point shoe tying).


One note I want to add for my own memory, and to help anyone else who might want to make a doll using this pattern, is that it would be better to trace and embroider the face before doing any of the sewing. I waited until the end like the pattern says, and it didn't turn out quite as great as it could have. The embroidery wasn't that hard, but sketching on the face was hard and I think it could have turned out better if I had done it before. At the very least, you should trace the face onto the fabric before sewing so that you know where to embroider later on. Hopefully those notes help someone else who might use the pattern.

Another thing, sewing up the bottom of the doll was SUPER hard for me. It definitely did not turn out very good, which is unfortunate because it is sewn on the outside so you can see my horrible stitching. I am grateful for the tulle skirt that covers my poor sewing. Hopefully my sister-in-law (who happens to be much better at sewing than I am) won't judge me when she looks at it. I find comfort in the fact that it is for a four year old and she will probably never look at the seems or the sewing.

To make the tulle skirt I just measured out a piece of elastic, cut it, sewed the ends together and wrapped cut pieces of tulle onto it. I don't know what the technique I used is called, but I would bet it's pretty easy to find youtube videos of tulle skirt making on the internet.

Thursday, January 26, 2012

Finished Advent Calendar

Remember THIS crazy project I worked on FOREVER. Well I wanted to show you all how the finished product turned out. December flew by in a hurry. And I guess January has too, since it's almost February.

It actually seems like another lifetime that I worked on this advent calendar and finished it. I have to be honest that by the time I actually finished, I was really annoyed with everything about it. It took all of my will power just to get it done. But, it's done now and I can look at it, folded neatly in my storage closet with my Christmas decorations, and enjoy the results of my labors.


Here's a picture of the top. Everything was hand stitched on so it took a long time. It was definitely worth it in the end. It looks beautiful!


And here is the finished project hanging on the wall. I need to re-do the star next year and also hang it differently because it is all wrinkly at the bottom. But, I put it away for now and will tackle those tiny details next Christmas.

I am so excited to have this advent calendar for my family to enjoy for years to come. It was a lot of work so if you want to do one then I would seriously start RIGHT NOW. That way you can do a little at a time and not be so annoyed with it in the end.

Tuesday, January 24, 2012

Still Crafting...

Hi there! For anyone who actually looks at this blog, I am still here and I am still crafting. It is precisely because I have been so focused on creating that I have not had time to post my creations.

Just to prove I am still moving, here is one of my creations that I just finished...


I made this little ballerina doll for my niece who is turning four this week! I'm off to send it in the mail. I hope she loves it, because I do!

More pictures, with a link to the pattern, and my thoughts on it coming soon!