Thursday, October 13, 2011

Chicken, Wild Rice & Potato Soup

This might very well be the very first recipe I have ever posted that is actually one that is technically mine. Of course it was adapted from an original recipe, but I was the one who adapted it! I first tried the original recipe when I was a new mom and my friend, Natalie, brought dinner to us. She made this soup but it originally has mushrooms instead of potatoes. We are not a mushroom loving family so we have altered it to suit our own tastes.


Doesn't that just look yummy? Well, it's not the best picture ever, but it really is yummy! Soup just screams Fall to me. I am so happy that it has finally cooled down a bit where we live and it even rained the day I whipped this up. I have made this soup many times over the past year and it never disappoints me. Pair it with freshly made wheat bread and you have an amazing dinner.

Chicken, Wild Rice & Potato Soup

3/4 cup wild rice
6 1/2 cups chicken stock/broth
1 1/2 cups shredded carrots
1/2 cup chopped onion
2 cups peeled, diced potatoes
3/4 cup chopped celery
2 Tbsp. butter
2 Tbsp. flour
1/4 tsp. salt
1/4 tsp. black pepper
1 cup whipping cream (you can also use milk)
2 cups cooked, diced chicken (I bake mine at 350 for about 15-20 minutes. Put salt and pepper on it and cover it with chicken stock/broth to make it extra moist.)

In a large pot combine rice, 5 cups stock/broth, carrots, celery, potatoes, and onion. Bring to a boil, then reduce heat and simmer for 35-40 minutes, until rice is tender but still chewy. In a small sauce pan, melt butter and add flour, salt and pepper; let this boil for 30 seconds then slowly add in the remaining 1 1/2 cup stock/broth. Boil for 1-2 minutes. Add cream, or milk, and then add mixture to soup pot and stir in chopped chicken.

This soup makes 6-8 servings. It is also very flexible. You can add as much or as little of any of the vegetables listed (or add mushrooms, zucchini, squash, peas, or green beans). Sprinkle chopped parsley and shredded Parmesan cheese on top to add more flavor and texture.

Wednesday, October 12, 2011

Mint Chocolate Cupcakes

I guess this week is cupcake week. I am so excited to finally get this recipe up on my blog. These cupcakes were AMAZING. As I previously mentioned I am a lover of white cupcakes. I have never liked chocolate cupcakes (or chocolate cake really), but these cupcakes are to die for. It's really the mint that does it for me. So if you like mint and chocolate together then you will definitely want to make these the next time you are craving something sweet.


This is yet another of Mel's fabulous creations over at Mel's Kitchen Cafe. I told you I loved her recipes. If there is something I want to make and don't have a recipe for I typically start at her website to see if she has a recipe for it. Her pictures are of course much better than mine so check them out HERE.

NOTE: The frosting in this recipe makes a lot. I frosted 30 cupcakes and only used about half of the frosting. If you don't want leftover frosting then I would half the frosting portion of the recipe. Or if you want to do what I did you could make mint brownies with the extra frosting once the cupcakes are gone. Also, I made these cupcakes the night before Abby's baby shower and then put them in the fridge. I pulled them out about 10 minutes before the party and stuck an Andes Mint on the top of each one. It made preparations for the party super easy.

Over-the-Top Andes Mint Cupcakes

Cupcakes:

2 cups sugar
1-3/4 cups all-purpose flour
3/4 cup HERSHEY’S Cocoa
1-1/2 teaspoons baking powder
1-1/2 teaspoons baking soda
1 teaspoon salt
2 eggs
1 cup milk
1/2 cup vegetable oil
2 teaspoons vanilla extract
1 cup boiling water

Chocolate Mint Filling:
1/2 cup chocolate chips
3 tablespoons heavy cream
1 teaspoon peppermint extract
1/3 cup powdered sugar

Mint Buttercream Frosting:
1 cup (2 sticks, 16 tablespoons) butter, softened to room temperature
8 ounces cream cheese, softened to room temperature
32 ounces powdered sugar (about 7 cups)
1/2 cup heavy cream
1 teaspoons pure vanilla extract
2 teaspoons peppermint extract
Green food coloring

30 Andes mints for garnish

Directions:
For the cupcakes, preheat oven to 350°F. Line muffin cups with paper baking cups. In a large bowl, stir together sugar, flour, cocoa, baking powder, baking soda and salt. Add eggs, milk, oil and vanilla; using a handheld electric mixer or an electric stand mixer, beat on medium speed for 2 minutes. Stir in boiling water. The batter will be on the thinner side. Fill the muffin cups 2/3 full and bake for 18-20 minutes, until a toothpick inserted in the center comes out with moist crumbs. This recipe makes about 30 cupcakes. So you may need to bake the cupcakes in installments if you only have 1 or 2 muffin tins. Let the cupcakes cool completely on a wire rack, after removing them from the muffin tin.

For the mint filling, while the cupcakes are baking, place the chocolate chips and heavy cream in a small microwave-safe bowl and heat for 1 minute at 50% power. Stir. Repeat the process until the mixture is smooth. Stir in the peppermint extract and powdered sugar, whisking until smooth. Let the mixture cool to room temperature (but don’t let it get too stiff) and pour it into a squeeze bottle or a ziploc bag (it helps to place the ziploc bag, one point down, in a tall glass while filling).

When the cupcakes are cool, insert the tip of the squeeze bottle into the center of the cupcake and press gently to fill the middle of the cupcake with the mint ganache.

For the frosting, in a large bowl, beat the cream cheese and butter until light and fluffy. Add the powdered sugar and mix until smooth. Add the heavy cream and peppermint and vanilla extracts. Beat until light and fluffy. Add green food coloring until the color you like is achieved.

Frost the cooled, filled cupcakes with frosting (using a large star tip) or simply spread the frosting in a large dollop with a butter knife or flat spatula. Garnish with an unwrapped Andes mint and a drizzle of leftover ganache (make sure the ganache is completely cool or it will melt the frosting when you drizzle it on top of the cupcake). Refrigerate until serving.

Monday, October 10, 2011

Perfect Birthday Cupcakes {And Frosting}

Remember these yummy looking cupcakes that I made forever ago for my son's first birthday?


Well here is the spectacular recipe for them. I found both the cupcake and the frosting recipes at Mel's Kitchen Cafe. You already know how much I love her recipes. I have tried quite a few of them and have always loved everything I have made of hers. Click HERE for a direct link to the recipes on her website.


These cupcakes were absolutely perfect. I personally prefer white cupcakes and these were deliciously moist and sweet (but not too sweet). The frosting was also equally as good, if not better. I think this recipe will be my go to cupcake recipe for parties and birthdays. Give them a try - you will not be disappointed.

Vanilla Buttermilk Cupcakes

1 1/2 cups all-purpose flour
1 1/4 teaspoon baking powder
1/4 teaspoon baking soda
1/4 teaspoon salt
1 1/2 sticks (12 tablespoons) butter, softened to room temperature
1 cup granulated white sugar
2 large eggs
1 large egg yolk
2 teaspoons pure vanilla extract
1/2 cup buttermilk

Preheat oven to 350 for light, aluminum or silicone muffin pans or 325 for dark, nonstick muffin pans. Line about 16-24 muffin cups with liners and set aside.

In a medium bowl, whisk together dry ingredients. In a large bowl, beat butter and sugar until fluffy, about 2 minutes, scraping down the bowl as needed. Mix in eggs and egg yolk one at a time and then mix in the vanilla. Add 1/3 of the flour mixture to the wet ingredients. Combine. Add 1/4 cup of the buttermilk. Mix. Add another 1/3 of the dry ingredients. Mix. Add the final 1/4 cup of the buttermilk. Mix and then add the final 1/3 of the dry ingredients. Mix until combined and the batter is smooth. Spoon out batter into lined cupcake pan, filling only halfway or just barely over halfway.

Bake for about 15-18 minutes (depending on the heat of your oven based on the type of muffin pan you have), until a toothpick inserted into the middle of a cupcake comes out with moist crumbs. Don’t overbake!

Remove the cupcakes to a wire rack to cool completely. Frost with vanilla buttercream frosting.


Quick Vanilla Buttercream Frosting

½ cup (1 stick, 8 tablespoons) butter, softened to room temperature
3 ounces cream cheese, softened to room temperature
16 ounces powdered sugar (about 3 ½ cups)
¼ cup heavy cream
1 teaspoon pure vanilla extract

In a large bowl using a handheld mixer or the bowl of an electric stand mixer, beat the softened butter and cream cheese together until it is light and creamy, about 2 minutes. Mix in the vanilla. Add the powdered sugar gradually and mix in fully after each addition. Cream at low speed until well blended and creamy. Pour in the heavy cream and whip until the frosting is light and fluffy.

Tuesday, October 4, 2011

Overnight Blueberry French Toast

For this recipe I think the picture says it all!!!


Doesn't that just look AMAZING. And it tastes amazing too. This is a definite must try in blueberry season. We still have blueberries everywhere here but the prices are definitely going up. My mom tried this recipe when we visited Utah last May. She made it knowing that she would score some major points with my husband! He loves everything and anything blueberry (I have probably said that before). So go find some blueberries (you can use frozen ones too I think) and whip this up for a nice leisurely Saturday, or Sunday, breakfast/brunch. You will not be disappointed.

Overnight Blueberry French Toast
8-10 slices french (or sourdough) bread, torn into 1 inch pieces
1 pkg cream cheese, softened and whipped with 1/4 cup milk and 1/4 cup powdered sugar
1 cup blueberries
8 eggs, beaten
1 1/2 cups milk
1 tsp vanilla
1/4 cup maple syrup
1 cup blueberries
3/4 cup sugar
2 tbs cornstarch
3/4 cup water
Lightly grease a 9x13 inch baking dish. Arrange half the bread cubes in the dish, and top with cream cheese mixture. Sprinkle 1 cup blueberries over the cream cheese, and top with remaining bread cubes. In a large bowl, mix the eggs, milk, vanilla extract, and syrup. Pour over the bread cubes. Cover and refrigerate overnight.
Remove the bread cube mixture from the refrigerator 30 minutes before baking. Preheat oven to 350 degrees. Cover, and bake 30 minutes. Uncover, and continue baking 25-30 minutes, until center is firm and surface is lightly browned.
In a medium saucepan, mix the sugar, cornstarch, and water. Bring to a boil. Stirring constantly, cook 3-4 minutes. Mix in the remaining 1 cup blueberries. Reduce heat, and simmer 5 minutes, until the blueberries burst. Pour over the baked french toast.

Saturday, October 1, 2011

Bunting Banner Template (Printable)

PS: HERE is a downloadable, printable template for making bunting banners. I used this template when I made this baby banner for my friend, Abby's, baby shower. You could use this template to make fabric or paper banners.

I look forward to making more bunting banners in the future with this easy template. It even has two different sizes of triangles in case you want to make different sized banners. I have a Halloween banner in the works that I am excited to show off soon! Happy crafting to you all!

Friday, September 30, 2011

90 Minute Shirt

Here's the birthday shirt I made for Bennett's first birthday. I wanted to test out the 90 Minute Shirt tutorial from MADE and I thought his birthday would be the perfect opportunity. I purchased a men's t-shirt from goodwill and went to work on it. I wanted his birthday to have a theme, but since he is only 1 year old and we didn't want to have a big party with friends I ended up deciding to go with a simple theme of balloons. That's why I made the balloon wreath and hung balloons from the ceiling. I also thought it would be fun to add 3 balloons (hand stitched) to the front of his birthday shirt.


I thought the balloons turned out cute, but I am really not skilled with hand stitching. I think this was actually my first attempt, unless you count sewing on ribbons and elastic to pointe shoes (which is definitely not the same thing). The fabric ended up gathering a little but once it was on him you couldn't really tell. I think you can probably tell that the perfectionist in me has died. At least when it comes to anything handmade by me. I think I am still a huge perfectionist when it comes to dance.


This is the best picture I captured of him with his birthday shirt. The other good ones I have you can't see the front of his shirt. I was very proud of myself for making a shirt for him. I like the idea of making them for him in the future, but I probably will only do it for birthdays. Then it can be a special birthday tradition. So there you have it. My first handmade clothes item for my son. Now I mark that off as completed on my goal check list for the year.

Wednesday, September 28, 2011

The Big 1

In May my cute son turned 1 year old. It was so much fun to plan a little birthday celebration for him. We didn't have a party but my brother flew into town to help us celebrate and my parents came the weekend after to celebrate at the local zoo with us. Even though we didn't have a big party with friends I did go all out and make it special.


I made a big birthday wreath for our door (which we can now use for every birthday in our family). I LOVE how it turned out, except I think I will add even more balloons so that you can't see the straw on the sides of the wreath. These birthday balloons are everywhere in blogland. But I think the initial idea came from How Does She?. The tutorial for the birthday wreath can be found HERE. I bought my balloons at Walmart and loved the colors.


We also hung balloons from the ceiling in our kitchen, which our little guy loved. I did not come up with that idea on my own, but rather it was Dana's idea over at MADE. I also made Bennett's shirt using a tutorial from Dana's website. I post all about his shirt soon.

We spent the day at a local amusement park for little kids and while Bennett was napping we whipped up cupcakes for dessert.


The cupcakes were amazing. I think they tasted better than any white cupcake I have ever had. And the frosting was yummy too. I'll share the recipe on another post as well.


He enjoyed his cupcake a little bit, but was pretty tired by the end of the day. We definitely wore him out celebrating. He mostly just smothered himself in blue frosting and ended up looking a bit like a blue smurf. See what I mean...


He went straight to the bath afterwards.

Monday, September 26, 2011

Bow Tie Diaper Banner

Okay, I really am far behind. I took these pictures back in May. That is crazy. And if you think that is crazy, I still have posts in the works from Bennett's birthday, which was also in May. Anyway. I have 2 friends who both had twins - 1 set of girls and 1 set of boys. This was a baby shower I helped with for the twin boys and their mama.

We didn't really have much of a theme. We just went with bright colors and had yummy food.


I made this cute diaper banner. I first saw the idea HERE and thought it was too cute not to do. I might throw an all out bow-tie themed baby shower someday in the future since this was the only element of bow-ties at this one. I just love bow-ties for little guys.


The two twin mamas ready to meet their babes (or almost). Valerie (on the right) had her baby girls a couple of weeks after this picture and Kristen (who the baby shower was thrown for) had her baby boys in early July. It is so fun to see them together now with all four babies!

I didn't get any other pictures but it was a very fun evening! Congratulations Kristen on you beautiful babes.

Friday, September 23, 2011

Ratatouille

A couple of weeks ago I made this delicious dish of Ratatouille. It was absolutely amazing. My 16 month old gobbled it up. He could not get enough. And my husband and I loved it as well. We didn't even have leftovers the next day because we ate the entire thing between the 3 of us. I was so bummed that we ate it so fast that I made it again last week.


Me making our masterpiece the first time. It got slightly too browned for a good picture after it was baked.


Our second go at it. I made a bigger batch the second time around. Aren't all of the colors beautiful? The pictures are prettier HERE where the recipe comes from.


Doesn't that look scrumptious? Here's the recipe:

Ratatouille’s Ratatouille
As envisioned by Smitten Kitchen

1/2 onion, finely chopped
2 garlic cloves, very thinly sliced
1 cup tomato puree (such as Pomi)
2 tablespoons olive oil, divided
1 small eggplant (my store sells these “Italian Eggplant” that are less than half the size of regular ones; it worked perfectly)
1 smallish zucchini
1 smallish yellow squash
1 longish red bell pepper
Few sprigs fresh thyme
Salt and pepper
Few tablespoons soft goat cheese, for serving

Preheat oven to 375 degrees F.

Pour tomato puree into bottom of an oval baking dish, approximately 10 inches across the long way. Drop the sliced garlic cloves and chopped onion into the sauce, stir in one tablespoon of the olive oil and season the sauce generously with salt and pepper.

Trim the ends off the eggplant, zucchini and yellow squash. As carefully as you can, trim the ends off the red pepper and remove the core, leaving the edges intact, like a tube.

On a mandoline, adjustable-blade slicer or with a very sharp knife, cut the eggplant, zucchini, yellow squash and red pepper into very thin slices, approximately 1/16-inch thick.

Atop the tomato sauce, arrange slices of prepared vegetables concentrically from the outer edge to the inside of the baking dish, overlapping so just a smidgen of each flat surface is visible, alternating vegetables. You may have a handful leftover that do not fit.

Drizzle the remaining tablespoon olive oil over the vegetables and season them generously with salt and pepper. Remove the leaves from the thyme sprigs with your fingertips, running them down the stem. Sprinkle the fresh thyme over the dish.

Cover dish with a piece of parchment paper cut to fit inside. (Tricky, I know, but the hardest thing about this.)

Bake for approximately 45 to 55 minutes, until vegetables have released their liquid and are clearly cooked, but with some structure left so they are not totally limp. They should not be brown at the edges, and you should see that the tomato sauce is bubbling up around them.

Serve with a dab of soft goat cheese on top, alone, or with some crusty French bread, atop polenta, couscous, or your choice of grain.

Note: I put this over brown rice and it was delish!

Monday, September 19, 2011

"ABC" Magnets

In August I started working on crafts for our annual craft day at church. It only happens once a year and I was asked to help by contributing a couple of crafts to teach. One of the crafts that was picked for me to create, display, and teach were these alphabet magnets.


These are so much fun. They are easy to make and great for kids. I saw them on Pinterest of course. Which led me to THIS website with the instructions. I made a set for my nieces and nephew and will probably make a few more sets for other nieces and nephews in the future. Plus I made a set for my own little guy - which I quickly discovered he is still too young for. I think I will make a younger version of these with fabric for him to play with and learn his ABC's.

Wednesday, September 14, 2011

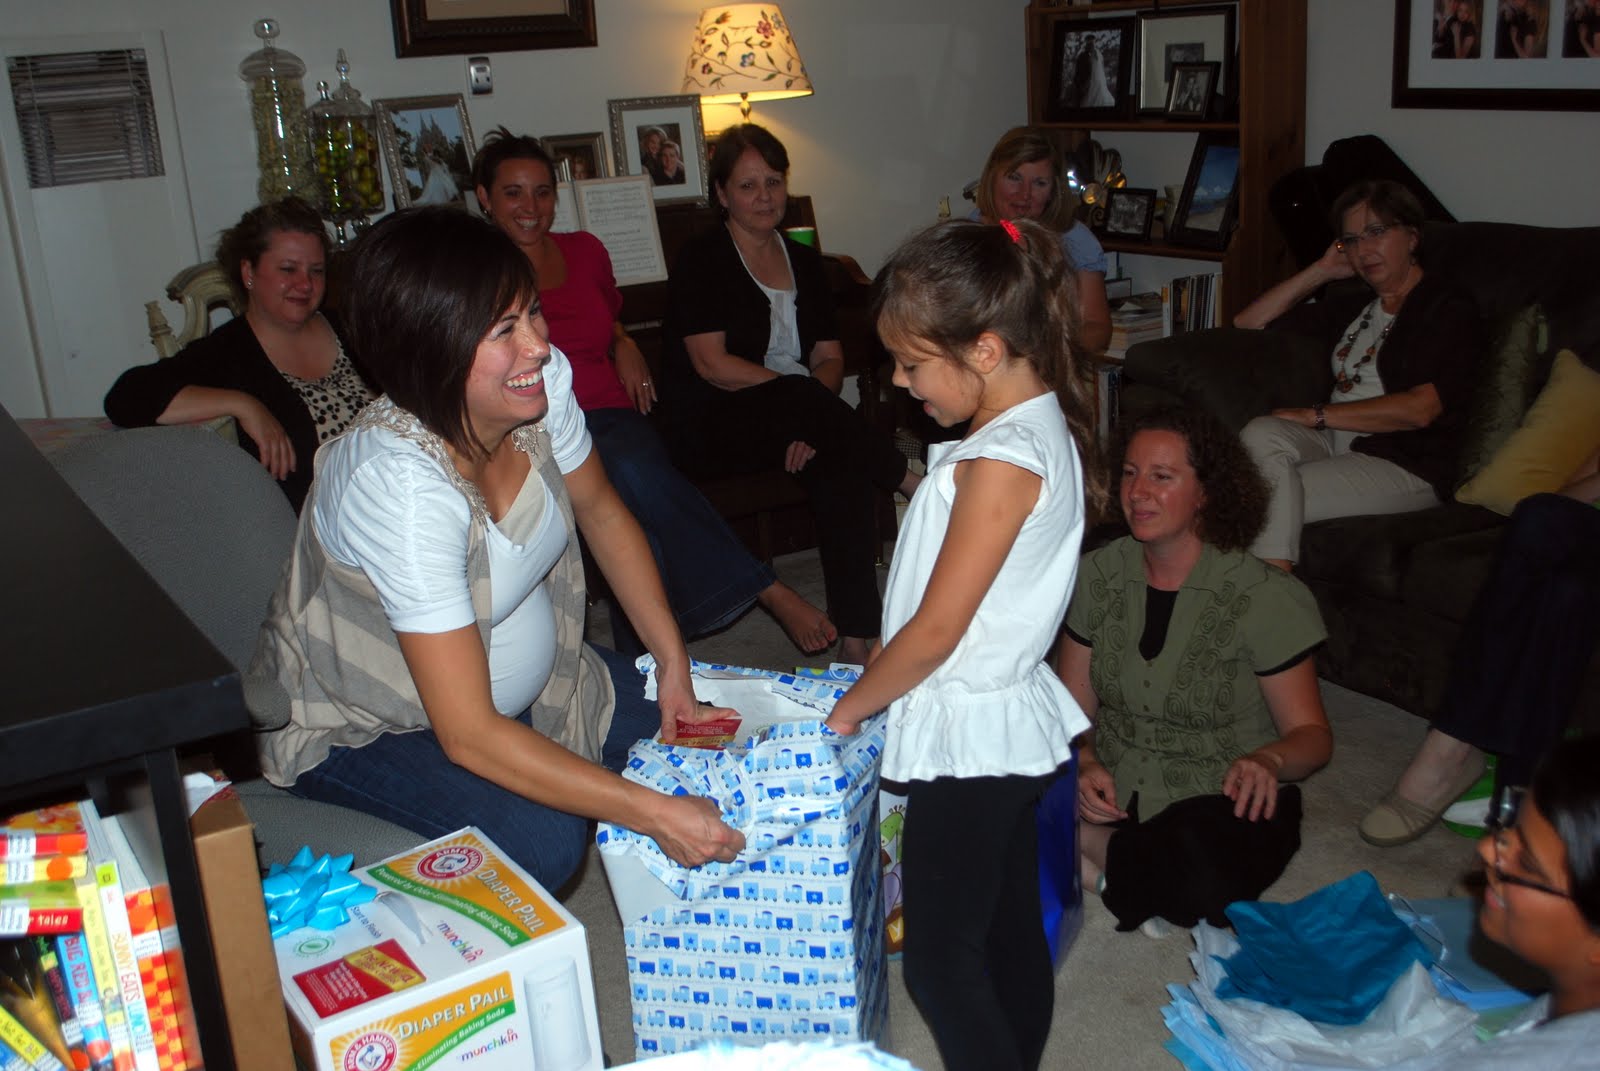
Abby's Baby Shower

Last night I hosted a baby shower for my good friend Abby. She is having a baby boy sometime this month (or maybe even October if he is too comfortable to come out). It was a pretty simple night, with snacks, conversations, and opening gifts.

We went with green and brown, which were the colors Abby chose. I love how it all turned out.


I made this banner. It was super simple but I thought it was the perfect touch for the simple shower.


And my husband helped me make these divine mint chocolate cupcakes (the frosting and the Andes mint on top were the best parts). These little beauties deserve their very own post.


We crammed 20 people in my tiny apartment. It was packed but very fun.


Doesn't Abby just look so happy? And that little girl is her darling daughter, Avrielle. She is 7 and is WAY excited to have a baby brother.


I thought this picture was perfect! Abby & Avrielle. Thanks for having a baby Abby so that I could throw you a party! It was so much fun! Lets do it again in say...2/3 years?

Tuesday, August 30, 2011

Sewn Note Cards

I have so much to catch up on with this blog. I have been working on tons of projects and cooking up new recipes in the kitchen. It was a very busy summer with everything that took place in our home. Now I am hopefully ready to get some posts up and running.


This craft is from way back in June. I had the privilege of attending girls camp with the girls in my church (The Church of Jesus Christ of Latter-Day Saints). I am in charge of helping the girls get to camp but was also invited to help out while camping. It was a 6 day camp and was very fun, but very tiring. Up at the camp the girls have mailboxes where they can receive little notes/mail from their friends or family members or from fellow campers and leaders. Before camp we had our Relief Society write letters to each of the girls for each day. So the girls got 5 letters (since the 6th day was just clean-up) each. I used THIS tutorial for hand-sewn note cards. It was so much fun to have a simple, yet handmade, card to give the girls each day. I want to make a hundred more of these now that I know how.


I actually did make 100 of these and it probably took about 2 hours from start to finish. They are so easy, but beautiful. And the best part about them is that I used lots of paper scraps.


I think I will make them again for next years girls camp (with a different shape on the front).

Wednesday, June 29, 2011

A Dad's Best Friend

I think every dad I know loves snickerdoodles. They are my dad's favorite dessert. And my father-in-law loves them too. We were able to be with my dad on his birthday this year so we made him snickerdoodles for his birthday dessert. He loved them and they were all gone the very next day. So, we made 3 more batches and he stored a secret stash so that he could eat as many as he wanted.


I like snickerdoodles a lot as well and this recipe is nothing short of amazing. They are also really fast and easy to make. They won't look done when you take them out but they crisp up a bit once they are out of the oven so under cooking them a tad is better than seeing them golden brown in the oven. However, I know from experience that they are still delicious even when they get a little extra crispy.

Snickerdoodles

½ cup shortening

½ cup butter - softened

1 ½ cups granulated sugar

2 eggs

2 tsp cream of tartar

1 tsp baking soda

½ tsp salt

2 ¾ cups flour

Topping:

2 tsp cinnamon

4 tbsp granulated sugar

Cream shortening, butter, and sugar. Mix in eggs and then add dry ingredients. Scoop cookies into balls and roll in cinnamon mixture. Bake on ungreased sheet at 375 degrees for 12-14 minutes. Cool on racks.

Tuesday, June 28, 2011

Sausage & Egg Megmuffins

In our family we enjoy breakfast for dinner quite often (usually about once per week). Our old standbys are breakfast burritos, pancakes, or breakfast sandwiches. So here's what our sausage, egg mcmuffins look like Meagan style (hence the name Sausage & Egg Megmuffins, haha).


We cook up a sausage patty; my famous most delicious, secret recipe scrambled egg patty (really not that secret - just add a little milk and cheese); slice a thick piece of Tilamook cheddar cheese; and pile it all on a toasted, buttered, sourdough English muffin. That's what I call a good breakfast sandwich. You could also add sliced bell peppers and avocado to spice/health it up.

I usually pair these delicious sandwiches with a big bowl of cut up fruit. This is yet another quick and easy meal at our home. Hope you enjoy some breakfast for dinner soon.

Sunday, June 5, 2011

Creamy Macaroni & Cheese

All I can really say about this dish of macaroni is YUM, YUM, YUMMY!


Just ask my little guy! Forget the boxed mac 'n cheese. This stuff is way creamier, and made with all sorts of cheese! Parmesan, sharp cheddar, and cottage cheese. It is seriously AMAZING!


Mmmmmm! He can't get it in his mouth fast enough!


And the best part about it all - it's super easy to make. So gather your ingredients and get ready for a macaroni dish that will knock your kids socks off!

Favorite Mac' and Cheese
From my friend Hilary

1 (8 oz) pkg. elbow macaroni
1 (8 oz) pkg. shredded sharp Cheddar cheese
1 (12 oz) container small curd cottage cheese
1 (8 oz) container sour cream
1/4 cup grated Parmesan cheese
Salt & Pepper to taste
1 cup dry bread crumbs
1/4 cup butter, melted

Preheat oven to 350 degrees. Bring a large pot of lightly salted water to a boil; add pasta and cook until done. Drain. In 9x13 inch baking dish, stir together macaroni, shredded Cheddar cheese, cottage cheese, sour cream, Parmesan cheese, salt, and pepper. In a small bowl, mix together bread crumbs and melted butter. Sprinkle topping over macaroni mixture. Bake 30-35 minutes or until top is golden brown.

Wednesday, June 1, 2011

Cornbread

It has been a while since I have had a chance to post on this blog. I have so many projects, recipes, and crafts to post. Hopefully I can get caught up this month.

For starters I wanted to share my favorite cornbread recipe! It is quick, easy, and truly the best cornbread ever!

Once you try this cornbread you'll never be satisfied with any other recipe. It is so sweet and delicious that you could serve it as dessert with chili or any other meal you wish. I often make it without the brown sugar topping and top it with butter and honey instead (as pictured above). Either way is tasty!

1 cup flour
1 cup yellow corn meal
2/3 cup sugar
2/3 cup brown sugar
1 tsp salt
3 1/2 tsp baking powder
1 egg
1 cup milk
1/3 cup vegetable oil (or olive oil for a healthier spin)

1. Mix all ingredients together
2. Pour in greased 8'' x 8'' pan
3. Bake at 400 for 20-25 minutes
4. Remove from oven and mix 1/4 cup brown sugar and 2 tbsp melted butter to sprinkle on top

Note: This cornbread is so good that I usually make a double batch and bake it in a 9x13 inch glass baking dish.

Friday, April 29, 2011

Sweet Spinach & Fruit Salad

Another simple recipe for a delicious salad to pair with any meal! I probably make this salad at least once a week with our regular meals. It is scrumptious and I always love how colorful and healthy it is!


Sweet Spinach & Fruit Salad

Spinach
Sliced Strawberries
Red Grapes (cut in half)
Slivered Almonds
Dried Cranberries
Crumbled Feta Cheese

Combine all ingredients in the quantities you desire and toss with your favorite sweet dressing (we usually use poppy seed). You can also add ripe pears, bacon, blueberries, or mandarin oranges. The possibilities are endless.

If you live near a Trader Joe's then try their Pear & Gorgonzola Salad Dressing with these salad ingredients. You will never want to buy another salad dressing in your life.

Wednesday, April 27, 2011

Open Faced Hummus Pita Sandwiches

I am always looking for super simple, healthy meals. A few years ago one of my friends gave me this idea while we were camping. The funny thing was that I forgot all about it until we planned a camping trip a few weeks back. These are so flavorful and delicious. And the possibilities are endless with toppings and flavors.


Open Faced Hummus Pita Sandwiches

Whole Wheat Pita Bread (you can also use naan or any other flat bread)
Your Favorite Hummus (I use Trader Joe's Original)
Sliced Red Bell Peppers
Basil Leaves

Spread the hummus on your bread, top with bell peppers and broken pieces of basil leaves. You could really use any toppings you think would go well with hummus. Carrots, celery, broccoli, tomatoes, cucumbers, etc.

Give it a try! You won't be disappointed!

Monday, April 25, 2011

Easter 2011

This year Easter was kind of a pathetic attempt at a celebration for me.


These three jars were all the Easter decorating I had time for. And I didn't even get a wreath on my door - totally lame.

But I was pleased that the Easter bunny still managed to find our poorly decorated apartment. And he still left treats and gifts for us all.


Bennett had a fun first Easter playing with the eggs!


And he looked so handsome in his new Easter outfit!

We did enjoy a magnificent Easter feast (just for the 3 of us) with THESE most amazing au gratin potatoes. They were the most delicious potatoes I have ever eaten. I didn't get pictures though so check out Mel's Kitchen Cafe for pictures good enough to eat.

We also enjoyed a slower than usual Sunday morning with dad home to eat breakfast with us. We had IHOP pancakes (recipe to come soon), scrambled eggs, and fresh strawberries. That is the biggest breakfast I have made on a Sunday in probably over a year now. It was fun to eat all together.

I also whipped up some special Easter cupcakes for dessert, although by the time we ate dinner and candy from the Easter Bunny we had no room for our cupcakes. They were fun nonetheless.


Eggs in the Grass Easter Cupcakes

Cupcakes
Frosting
Shredded, Sweetened Coconut
Green Food Coloring
Jelly Beans

Put coconut in a bowl and put 4 drops of green food coloring in. Mix with a fork until coconut is a nice, grassy green. Frost cupcakes, dip in green coconut, and put jelly beans on top so they look as though they are Easter eggs hiding in the grass.

I had this idea from Our Best Bites' chick cupcakes. Then I saw Dana's Easter eggs in the grass cookies at MADE and I sort of just combined the ideas to create my own version.

Hope you all had a wonderful Easter!

Friday, April 22, 2011

Reusable Grocery Bag

I LOVE the idea of making your own reusable grocery bags and I NEED to make a few of them soon! I had hoped to get them done this week in honor of Earth Day today but I just have not found the time. Too many other more important projects to finish first!

I searched for a tutorial and decided I would follow this one at sew4home.


Isn't it gorgeous? Click on the picture for the detailed instructions.

I love the look and after reading through the instructions it seems extremely durable. Happy Earth Day to you all!